The Best Old School Chocolate Traybake Cake Recipe for Sweet Joy
Chocolate lovers unite for a classic dessert that never disappoints.
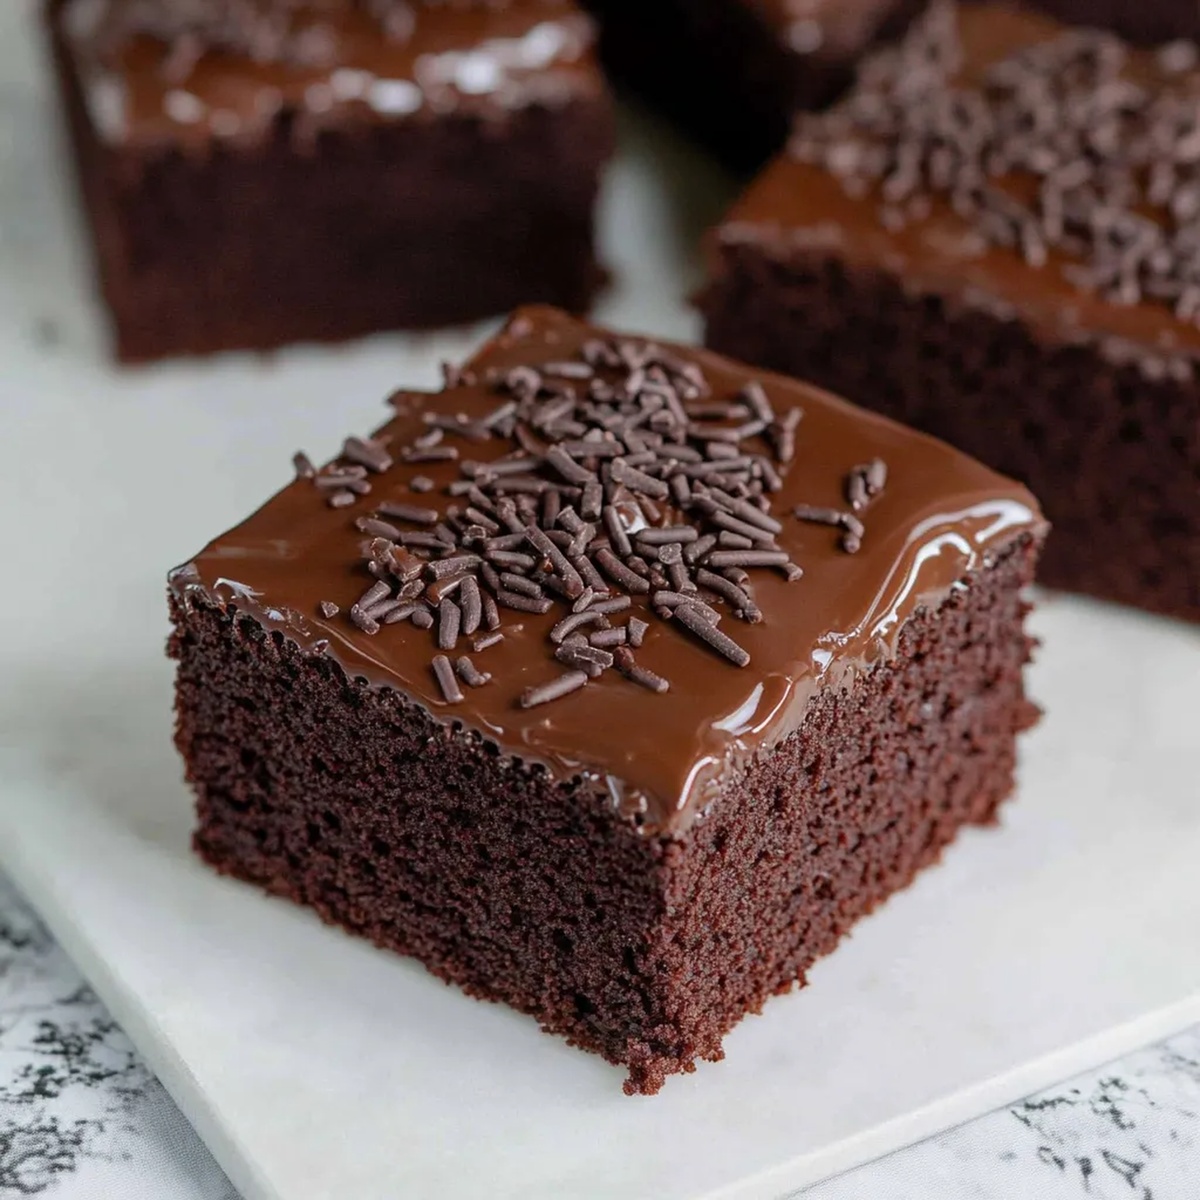
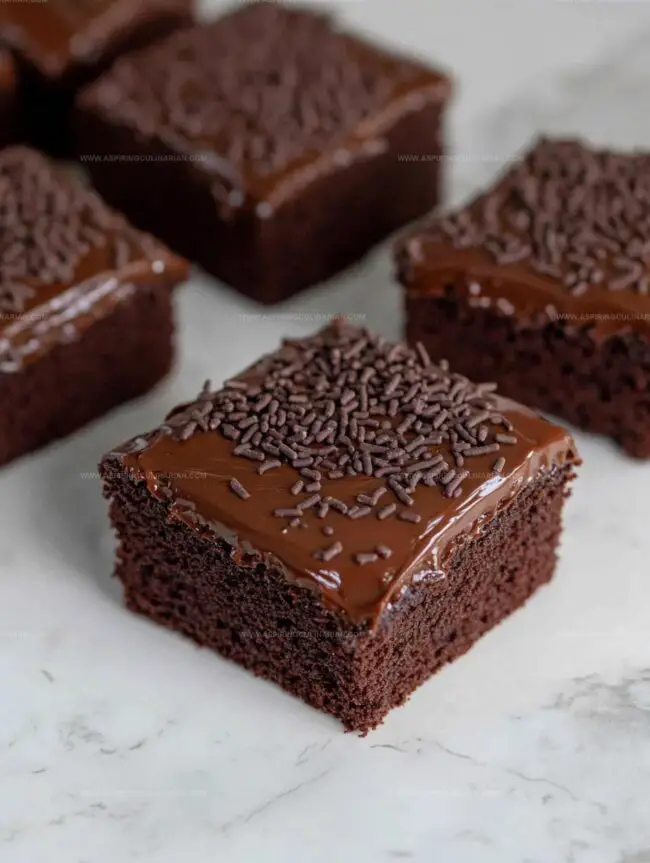
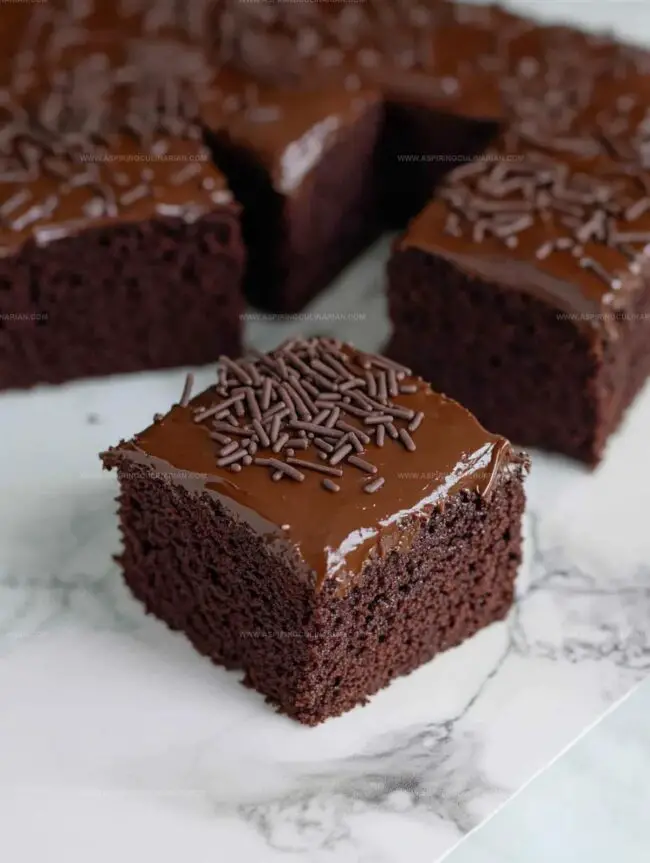
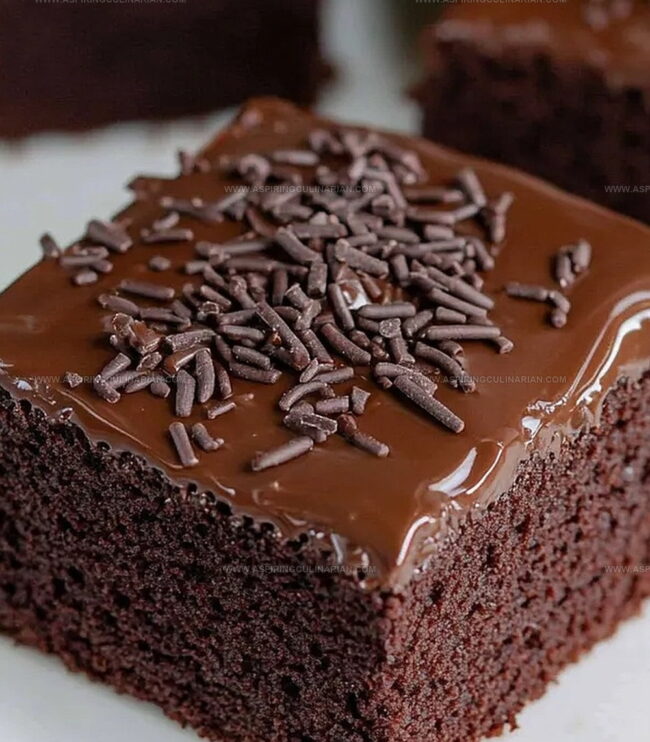
This old school chocolate traybake cake recipe delivers pure nostalgia with every bite.
Rich, moist, and incredibly simple to make, the cake transports you back to childhood kitchens.
Each slice promises decadent chocolate flavor that melts in your mouth.
The straightforward method means even novice bakers can create something spectacular.
Comfort and sweetness blend perfectly in this timeless treat.
You’ll fall in love with this foolproof recipe that celebrates the joy of traditional baking.
Old School Chocolate Traybake Cake: Classic Features
Ingredients for a Rich Chocolate Traybake
Dry Ingredients:Wet Ingredients:Glaze and Topping:Directions for Old-Fashioned Chocolate Cake
Step 1: Prepare Oven and Pan
Preheat the oven to 350F.
Line an 8×10-inch baking pan with parchment paper, ensuring extra paper hangs over the edges for easy cake removal later.
Step 2: Create Chocolate Batter
Cream butter and sugar in a large bowl using an electric mixer until the mixture becomes light and airy.
Add vanilla extract and incorporate eggs one at a time.
Gently fold in dry ingredients:Mix until the batter looks smooth and rich in chocolate color.
Step 3: Bake the Cake
Spread the batter evenly across the prepared pan.
Slide the pan into the preheated oven and bake for 25-30 minutes.
Check doneness by inserting a toothpick into the center – it should come out clean.
Allow the cake to rest in the pan for 10 minutes before transferring to a wire cooling rack.
Step 4: Glaze and Decorate
Whisk glaze ingredients until completely smooth.
Once the cake has cooled completely, pour the glaze over the top and spread evenly.
Sprinkle chocolate decorations across the surface.
Wait for the glaze to set before cutting into delightful squares.
Tips for Soft, Chocolatey Cake Squares

Chocolate Traybake Variations to Explore
Serving Old School Traybake Cake
Best Ways to Store Chocolate Traybake
FAQs
Yes, you can use natural or Dutch-processed cocoa powder. Dutch-processed cocoa provides a deeper, smoother chocolate flavor and darker color.
Absolutely! This traybake has a balanced chocolate flavor that isn’t overly sugary, making it perfect for those who prefer subtle sweetness.
Insert a toothpick in the center – if it comes out clean with just a few moist crumbs, the cake is done. Avoid overbaking to keep the cake moist and tender.
Print
Old School Chocolate Traybake Cake Recipe
- Total Time: 50 minutes
- Yield: 12 1x
Description
Sweet chocolate traybake cake whisks nostalgic memories into a delightful dessert straight from grandma’s kitchen. Moist crumb and rich cocoa flavor promise pure comfort with each delectable slice you’ll savor.
Ingredients
Main Ingredients:
- 1 cup (226 grams) unsalted butter, softened to room temperature
- 1 1/4 cups (250 grams) granulated sugar
- 4 medium eggs, at room temperature
- 1 3/4 cups (220 grams) self-raising flour
- 1/4 cup (25 grams) unsweetened cocoa powder
Liquid and Flavoring Ingredients:
- 1 teaspoon pure vanilla extract
- 3 tablespoons (45 milliliters) whole milk
Glaze Ingredients:
- 1 1/2 cups (180 grams) powdered sugar, sifted
- 1 tablespoon unsweetened cocoa powder
- 2 tablespoons (30 milliliters) milk
- Chocolate sprinkles for decorating
Instructions
- Preheat the oven to 350°F and prepare an 8×10-inch baking pan by lining it with parchment paper, ensuring extra paper hangs over the edges for easy cake removal.
- Using an electric mixer, cream the butter and sugar until the mixture becomes light and airy, approximately 3-4 minutes. Incorporate vanilla extract, then gradually add eggs one at a time, mixing thoroughly after each addition.
- Gently fold flour, cocoa powder, and milk into the mixture, stirring until a smooth, rich chocolate batter forms without overmixing.
- Transfer the batter to the prepared pan, spreading it evenly with a spatula to ensure uniform thickness.
- Bake in the preheated oven for 25-30 minutes, checking doneness by inserting a toothpick into the center – it should come out clean when the cake is fully baked.
- Allow the cake to rest in the pan for 10 minutes, then carefully transfer to a wire rack using the parchment paper overhang.
- Once the cake has completely cooled, prepare the glaze by whisking ingredients until achieving a silky, smooth consistency.
- Pour the glaze over the cake, spreading it evenly across the surface and generously sprinkle with chocolate decorations.
- Let the glaze set for approximately 15-20 minutes before cutting into square servings.
Notes
- Ensure butter is at room temperature for smooth, lump-free creaming with sugar, creating a lighter cake texture.
- Use high-quality Dutch-processed cocoa powder for deeper, richer chocolate flavor and consistent color.
- Swap regular flour with gluten-free all-purpose flour blend and add 1/2 teaspoon xanthan gum for better structure.
- This cake stays moist for 3-4 days when stored in an airtight container at room temperature, making it perfect for advance preparation.
- Prep Time: 20 minutes
- Cook Time: 30 minutes
- Category: Desserts, Snacks
- Method: Baking
- Cuisine: British
Nutrition
- Serving Size: 12
- Calories: 300
- Sugar: 20 g
- Sodium: 150 mg
- Fat: 15 g
- Saturated Fat: 9 g
- Unsaturated Fat: 6 g
- Trans Fat: 0 g
- Carbohydrates: 40 g
- Fiber: 2 g
- Protein: 4 g
- Cholesterol: 70 mg
Lena Martinez
Contributing Writer & Culinary Educator
Expertise
Southwestern and Latin American cuisines, Vegetarian and plant-based recipe development, Culinary education and community outreach
Education
Santa Fe Community College, Santa Fe, NM
Certificate in Culinary Arts
Emphasized Southwestern cuisine and sustainable cooking practices
Lena grew up surrounded by the colors, spices, and traditions of the Southwest – flavors that sparked her love for bold, honest cooking. After earning her Culinary Arts certificate at Santa Fe Community College, she made it her mission to teach home cooks how to create flavorful, plant-powered meals without the fuss.
Her recipes are packed with vibrant ingredients, simple steps, and the kind of heart that turns a regular meal into something you’ll want to share. Outside the kitchen, Lena spends her time wandering farmers’ markets, trading family recipes, and helping young chefs find their voice through food.