
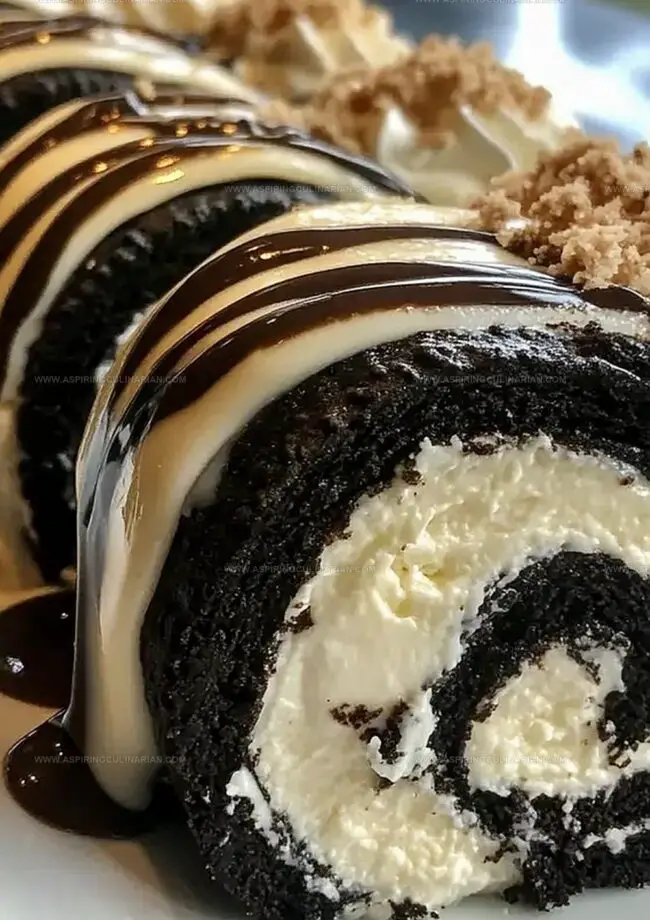
The Perfect Oreo Cream Cheese Cheesecake Sushi Roll Dessert Recipe
My culinary adventure with an Oreo cream cheese cheesecake sushi roll began unexpectedly during a late-night kitchen experiment.
Unexpected combinations often spark magical results in cooking.
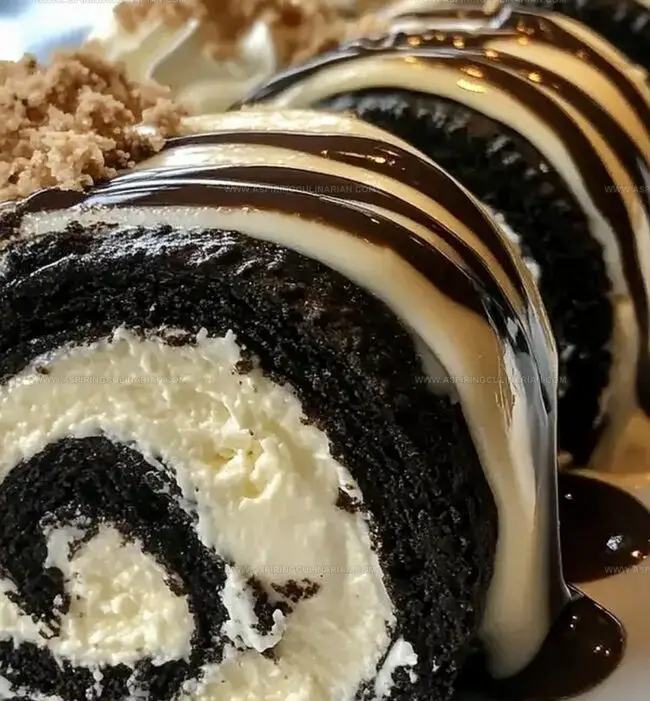
Creamy textures and sweet cookie crumbles create a playful twist on traditional desserts.
Blending classic American treats with Japanese-inspired presentation makes this recipe stand out.
Each bite promises a delightful surprise that challenges typical dessert expectations.
Compact and elegant, these rolls break all the traditional dessert rules.
You’ll want to share this unique creation that turns ordinary ingredients into something extraordinary.
Why Oreo Cheesecake Sushi Rolls Shine
Oreo Cheesecake Sushi Roll Must-Haves
Cake Base:Filling Ingredients:Decoration and Finishing:Making Oreo Cheesecake Sushi Roll Dessert
Step 1: Warm Up The Oven
Crank up your oven to a toasty 350F (175C).
Grab a 10×15-inch jelly roll pan and line it with parchment paper, creating the perfect stage for your delicious dessert.
Step 2: Mix The Magic Cake Base
Dive into preparing the chocolate cake mix.
Combine:Whisk everything together until smooth and dreamy.
Step 3: Spread The Love
Pour the chocolatey batter into your prepared pan.
Use a spatula to spread it evenly, creating a smooth canvas for your sushi-style treat.
Step 4: Bake To Perfection
Slide the pan into the preheated oven.
Bake for 12-15 minutes, listening for that magical moment when a toothpick comes out clean.
Step 5: Sugar Dust Prep
While the cake bakes, sprinkle a clean kitchen towel with a snow-like layer of powdered sugar.
Step 6: Flip And Release
Once baked, quickly flip the cake onto the sugared towel.
Gently peel away the parchment paper like unwrapping a delicate gift.
Step 7: Roll And Cool
While the cake is still warm, carefully roll it up in the towel.
Let it cool completely, creating the perfect flexible base for your dessert.
Step 8: Whip Up Creamy Filling
In a mixing bowl, beat softened cream cheese and butter until they transform into a silky smooth mixture.
Step 9: Sweet And Fragrant Touch
Gradually add powdered sugar and vanilla extract.
Mix until the filling becomes light and irresistible.
Step 10: Oreo Moment
Gently fold in crushed Oreo cookies, creating delightful chocolatey pockets throughout the filling.
Step 11: Unroll And Spread
Carefully unroll the cooled cake.
Spread the Oreo cream cheese filling edge to edge, creating a delectable layer.
Step 12: Elegant Re-roll
Gently roll the cake back up, ensuring the filling stays perfectly in place and the roll remains tight and beautiful.
Step 13: Chill Out
Wrap the rolled cake in plastic wrap and let it relax in the refrigerator for at least an hour.
Step 14: Chocolate Drizzle
Melt white chocolate and drizzle it artfully over the top of the cake roll.
Step 15: Final Flourish
Decorate with whole Oreo cookies and sprinkle extra crushed Oreos for a stunning finish.
Step 16: Serve And Enjoy
Slice into beautiful portions and serve immediately.
Watch as everyone falls in love with your creative dessert!
Oreo Cheesecake Sushi Roll Smart Tips
Oreo Cheesecake Sushi Roll Sweet Twists
Serving Oreo Cheesecake Sushi Roll Dessert
Oreo Cheesecake Sushi Roll Storage Guide
FAQs
The Oreo Cream Cheese Cheesecake Sushi Roll looks complex but is actually quite simple. With basic baking skills and following steps carefully, home bakers can successfully create this impressive dessert.
Absolutely! While Oreos provide a classic flavor, you can substitute with chocolate sandwich cookies, graham crackers, or any crunchy cookie you prefer. Just ensure the cookie is finely crushed for the best texture.
No special equipment is required. You’ll need standard baking tools like a jelly roll pan, mixing bowls, electric mixer, kitchen towel, and plastic wrap. Most home kitchens already have these items.
Print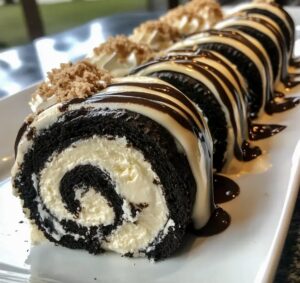
Oreo Cream Cheese Cheesecake Sushi Roll Dessert Recipe
- Total Time: 45 minutes
- Yield: 12 1x
Description
Indulgent Oreo cream cheese cheesecake sushi roll blends Japanese precision with American dessert creativity. Sweet and creamy slices promise a playful culinary adventure you’ll savor with pure delight.
Ingredients
Cake Base:
- 1 box chocolate cake mix (or homemade chocolate cake)
- 3 large eggs
- 1/2 cup (120 milliliters) vegetable oil
- 1 cup (240 milliliters) water
- 1 teaspoon vanilla extract
Filling and Topping:
- 8 ounces (226 grams) cream cheese, softened
- 1/4 cup (57 grams) unsalted butter, softened
- 1/2 cup (60 grams) powdered sugar
- 1 teaspoon vanilla extract
- 1/2 cup (60 grams) crushed Oreo cookies (about 6–8 cookies)
- 1/4 cup (45 grams) white chocolate, melted
- 4–6 whole Oreo cookies (for decoration)
Finishing Touch:
- Powdered sugar (for dusting)
- Extra crushed Oreo cookies (for garnish)
Instructions
- Preheat the oven to 350°F (175°C) and prepare a 10×15-inch jelly roll pan with parchment paper for the chocolate cake base.
- Mix the chocolate cake ingredients according to package instructions, combining eggs, oil, water, and vanilla extract until smooth.
- Pour the batter into the prepared pan, spreading it evenly to create a thin, uniform layer.
- Bake for 12-15 minutes, checking doneness with a toothpick that should come out clean when inserted.
- Generously dust a clean kitchen towel with powdered sugar while the cake is baking.
- Immediately after baking, carefully invert the hot cake onto the sugar-coated towel and gently remove the parchment paper.
- While the cake is still warm, carefully roll it up inside the towel and allow it to cool completely at room temperature.
- In a mixing bowl, cream together softened cream cheese and butter until achieving a smooth, velvety consistency.
- Gradually incorporate powdered sugar and vanilla extract, mixing until the filling becomes light and fluffy.
- Gently fold crushed Oreo cookies into the cream cheese mixture, ensuring even distribution.
- Carefully unroll the cooled cake and spread the Oreo cream cheese filling across the entire surface.
- Tightly re-roll the cake, maintaining an even pressure to keep the filling intact and prevent cracking.
- Wrap the rolled cake in plastic wrap and refrigerate for at least 1 hour to set the filling and shape.
- Drizzle melted white chocolate over the chilled cake roll for an elegant finishing touch.
- Garnish with whole Oreo cookies and sprinkle additional crushed Oreos around the plate for added texture and visual appeal.
- Slice into elegant portions and serve chilled for a decadent dessert experience.
Notes
- Chill the cream cheese and butter beforehand to ensure a smooth, lump-free filling that spreads easily and creates a creamy texture.
- Use a kitchen scale for precise measurements, especially when measuring ingredients like flour and sugar, to guarantee consistent results every time.
- Crush Oreos in a food processor or sealed plastic bag for uniform crumbs that distribute evenly throughout the cream cheese mixture.
- For a gluten-free version, substitute the cake mix with a gluten-free alternative and use gluten-free Oreo-style cookies to accommodate dietary restrictions.
- Prep Time: 30 minutes
- Cook Time: 15 minutes
- Category: Desserts, Snacks
- Method: Baking
- Cuisine: Fusion
Nutrition
- Serving Size: 12
- Calories: 346 kcal
- Sugar: 31 g
- Sodium: 170 mg
- Fat: 22 g
- Saturated Fat: 9 g
- Unsaturated Fat: 11 g
- Trans Fat: 0.5 g
- Carbohydrates: 34 g
- Fiber: 1 g
- Protein: 4 g
- Cholesterol: 60 mg
Nathaniel Brooks
Founder & Recipe Developer
Expertise
Farm-to-table cuisine, Seasonal recipe development, Culinary storytelling
Education
Ivy Tech Community College – Indianapolis, IN
Culinary Arts / Hospitality Administration & Events
Focused on hands-on training in classical and modern culinary techniques.
Nathaniel’s story starts in the foothills of the Appalachian Mountains, where farm stands, backyard gardens, and old family recipes shaped his love for real food. After graduating from Ivy Tech Community College in Indianapolis, he spent years working in farm-to-table kitchens, learning how to turn local, seasonal ingredients into something memorable.
Today, Nathaniel pours that same spirit into every single recipe on Aspiring Culinarian – recipes that feel real, comforting, and connected to the land. When he’s not in the kitchen, you’ll find him foraging wild herbs, chasing sunsets with his camera, or writing about the flavors that shaped his roots.