
Homemade Peach Hand Pies Recipe: Sweetly Satisfying Treats
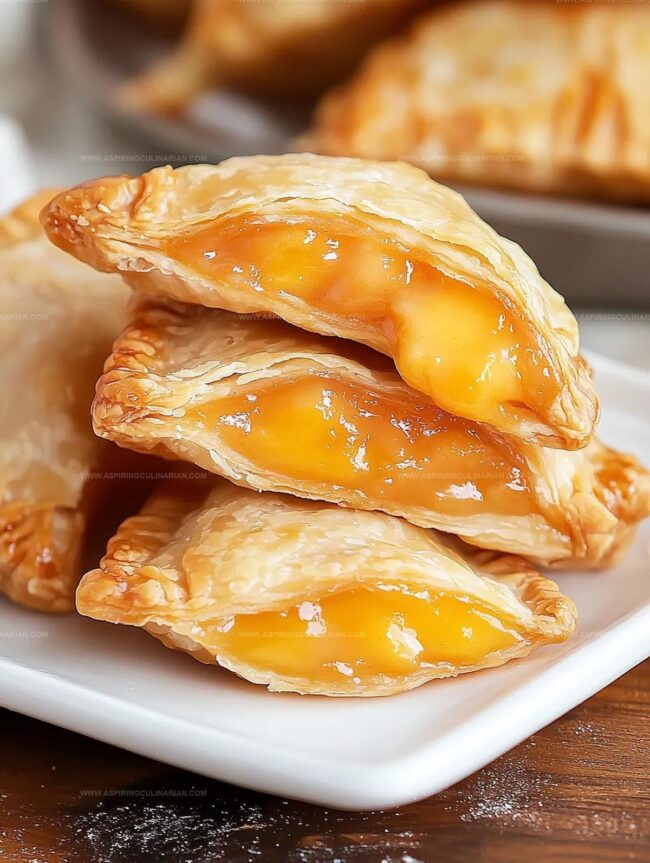
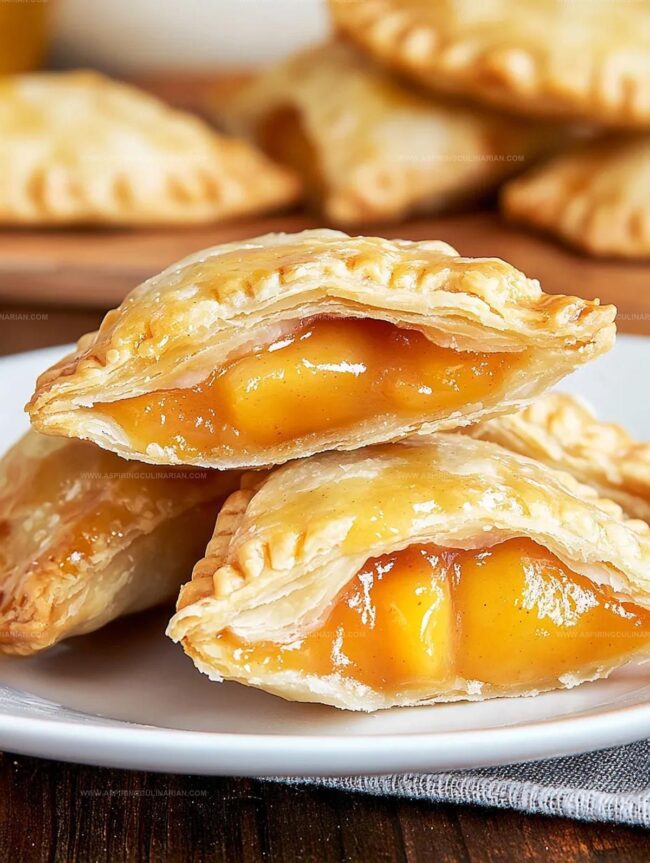
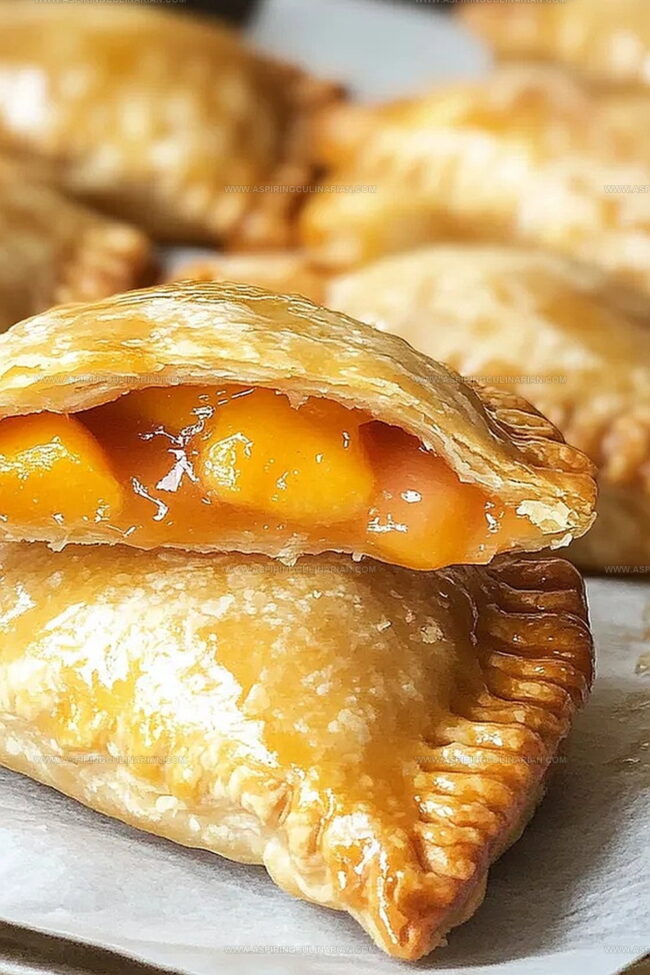
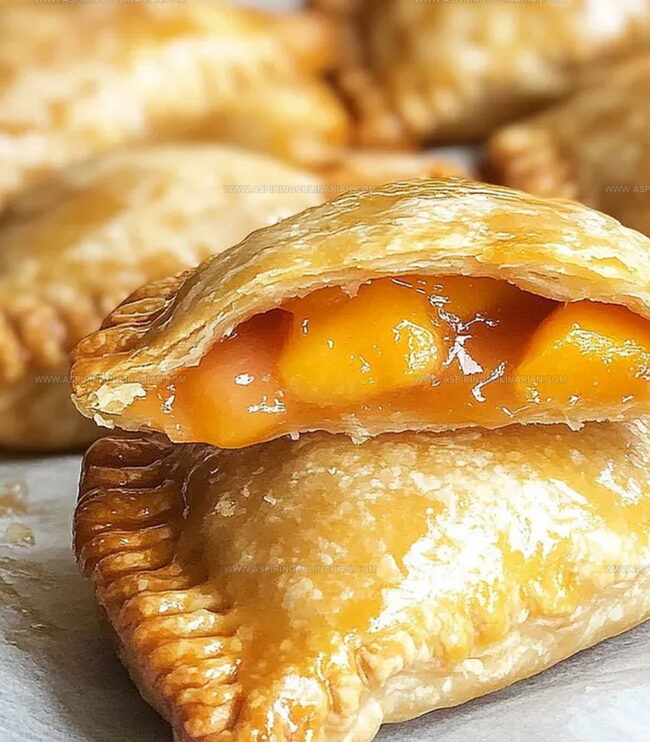
Sweet summer peaches tucked into golden, flaky hand pies create a dessert that melts in your mouth.
These compact treats capture the essence of seasonal fruit in every delightful bite.
Tender pastry wraps around juicy peach filling, promising a burst of flavor with each golden-edged morsel.
Perfectly portable and irresistibly cute, these hand pies bring joy to picnics, potlucks, and lazy afternoon snacks.
Each pie offers a personal-sized slice of comfort that connects you to classic baking traditions.
The crisp, buttery crust and warm peach interior combine for a nostalgic dessert that feels both elegant and comforting.
Bake a batch and watch smiles bloom as friends and family savor these delectable little treasures.
Peach Hand Pies What Makes Them Irresistible
Peach Hand Pies Ingredient Lineup
Main Ingredients:Peach Hand Pies Step-by-Step Prep
Step 1: Prepare Cooking Oil
Fill a heavy dutch oven or large pot with vegetable oil, creating a depth of 4-5 inches.
Insert an oil or candy thermometer to monitor temperature precisely.
Heat the oil until it reaches exactly 375°F.
Temperature control is crucial – too cold means greasy pies, too hot leads to burning.
Step 2: Create Pie Crusts
Retrieve refrigerated pie crust and roll it out smoothly.
Use a 5-6″ bowl as a template to trace round shapes.
Carefully cut circles using a sharp knife.
If the crust doesn’t yield three full rounds, gently roll it out further.
Your goal is to create six perfect pie crust circles.
Step 3: Add Fruity Filling
Spoon peach pie filling onto the center of each crust round.
Be strategic about quantity – add enough to satisfy but not so much that it prevents proper sealing.
Leave sufficient space around the edges to ensure a clean closure.
Step 4: Seal Handheld Treats
Moisten crust edges with water using fingertips.
This acts as a natural adhesive.
Carefully fold each round over, creating a half-moon shape.
Press edges firmly, crimping with fingertips to create a secure seal.
Ensure no filling can escape during frying.
Step 5: Craft Sweet Glaze
In a small bowl, combine powdered sugar, corn syrup, and water.
Whisk until smooth and glossy.
Cover with a damp paper towel to prevent premature hardening while you prepare for frying.
Step 6: Fry Golden Delights
Carefully lower one hand pie at a time into hot oil.
Fry each pie for 2-3 minutes, watching for a deep golden-brown color.
Use a slotted spoon to remove and drain on paper towels, which will absorb excess oil.
Step 7: Apply Glossy Coating
Grab a pastry brush and generously coat both sides of each fried hand pie with the prepared glaze.
The sweet layer will create a beautiful, shiny finish that enhances flavor and appearance.
Step 8: Serve Warm Treats
Repeat the frying and glazing process for remaining hand pies.
Arrange on a serving platter and enjoy immediately while they’re crisp and warm.
Best served fresh and shared with friends and family.
Insider Knowledge for Perfect Peach Hand Pies
Unique Peach Hand Pie Flavor Inspirations
Ways to Share Peach Hand Pies at Gatherings
Best Storage for Peach Hand Pies
FAQs
Use oil heated to exactly 375F. If the oil is too cold, pies will absorb excess oil; if too hot, they’ll burn quickly.
You can prepare the hand pies and assemble them before frying, but it’s best to fry and glaze just before serving to maintain crispy texture and fresh flavor.
Seal edges carefully by brushing water on the crust edges and crimping them tightly. Don’t overfill the pies – use about 2 tablespoons of filling per hand pie.
Print
Peach Hand Pies Recipe
- Total Time: 35 minutes
- Yield: 8 1x
Description
Delightful Peach Hand Pies blend southern charm with portable pastry perfection. Flaky golden crusts cradle sweet summer peaches, inviting you to savor each irresistible bite of homemade comfort.
Ingredients
Main Ingredients:
- 21 ounces (595 grams) peach pie filling
- 1 refrigerated pie crust
Sugar Glaze Ingredients:
- 1/2 cup (120 milliliters) powdered sugar
- 1 tablespoon (15 milliliters) water
- 1 teaspoon (5 milliliters) corn syrup
Frying Ingredient:
- Vegetable oil for frying
Instructions
- Prepare the oil by filling a heavy dutch oven or deep pot with vegetable oil to 4-5 inches. Insert an oil thermometer and heat to 375F, ensuring precise temperature for optimal frying results.
- Roll out refrigerated pie crust and use a 5-6″ bowl to trace and cut 6 circular rounds. Gently stretch with a rolling pin if needed to achieve desired size.
- Position approximately 2 tablespoons of peach pie filling onto the center of each pie crust round, leaving enough space around edges for sealing.
- Moisten pie crust edges with water using fingertips to help create a secure seal. Carefully fold each round over filling and firmly crimp edges together to prevent leakage during frying.
- Whisk powdered sugar, corn syrup, and water in a small bowl to create a smooth glaze. Cover with a damp paper towel to maintain consistency while preparing pies.
- Carefully lower one hand pie at a time into hot oil, frying for 2-3 minutes until achieving a deep golden brown color. Transfer fried pies to paper towels to drain excess oil.
- Use a pastry brush to generously coat both sides of each hand pie with prepared glaze, ensuring complete coverage.
- Continue frying and glazing remaining hand pies, serving immediately for maximum freshness and crispiness.
Notes
- Control oil temperature precisely to ensure crispy, non-greasy hand pies by using a reliable thermometer and maintaining steady 375F heat.
- Create uniform pie rounds by using a consistent bowl size or rolling pin technique to maximize dough usage and achieve consistent shape.
- Prevent filling leakage by carefully sealing edges with water and gently crimping crust, ensuring a tight closure before frying.
- Customize filling options by substituting peach with seasonal fruits like apple, cherry, or mixed berries for variety and personal preference.
- Prep Time: 20 minutes
- Cook Time: 15 minutes
- Category: Desserts, Snacks
- Method: Frying
- Cuisine: American
Nutrition
- Serving Size: 8
- Calories: 260
- Sugar: 15 g
- Sodium: 220 mg
- Fat: 14 g
- Saturated Fat: 2 g
- Unsaturated Fat: 12 g
- Trans Fat: 0 g
- Carbohydrates: 31 g
- Fiber: 1 g
- Protein: 2 g
- Cholesterol: 0 mg
Lena Martinez
Contributing Writer & Culinary Educator
Expertise
Southwestern and Latin American cuisines, Vegetarian and plant-based recipe development, Culinary education and community outreach
Education
Santa Fe Community College, Santa Fe, NM
Certificate in Culinary Arts
Emphasized Southwestern cuisine and sustainable cooking practices
Lena grew up surrounded by the colors, spices, and traditions of the Southwest – flavors that sparked her love for bold, honest cooking. After earning her Culinary Arts certificate at Santa Fe Community College, she made it her mission to teach home cooks how to create flavorful, plant-powered meals without the fuss.
Her recipes are packed with vibrant ingredients, simple steps, and the kind of heart that turns a regular meal into something you’ll want to share. Outside the kitchen, Lena spends her time wandering farmers’ markets, trading family recipes, and helping young chefs find their voice through food.