
Irresistible Peanut Butter Chocolate Chip Cookie Cups Recipe
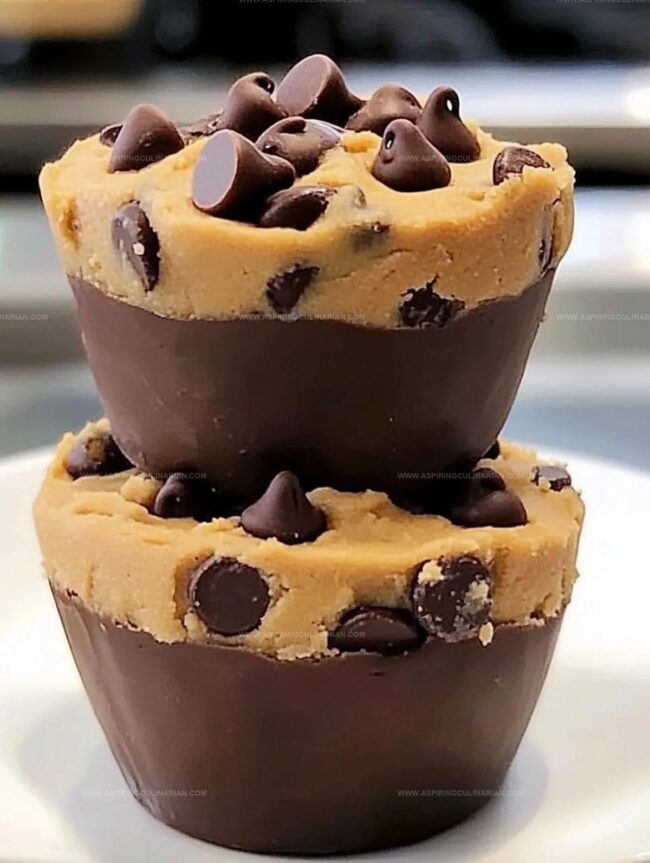
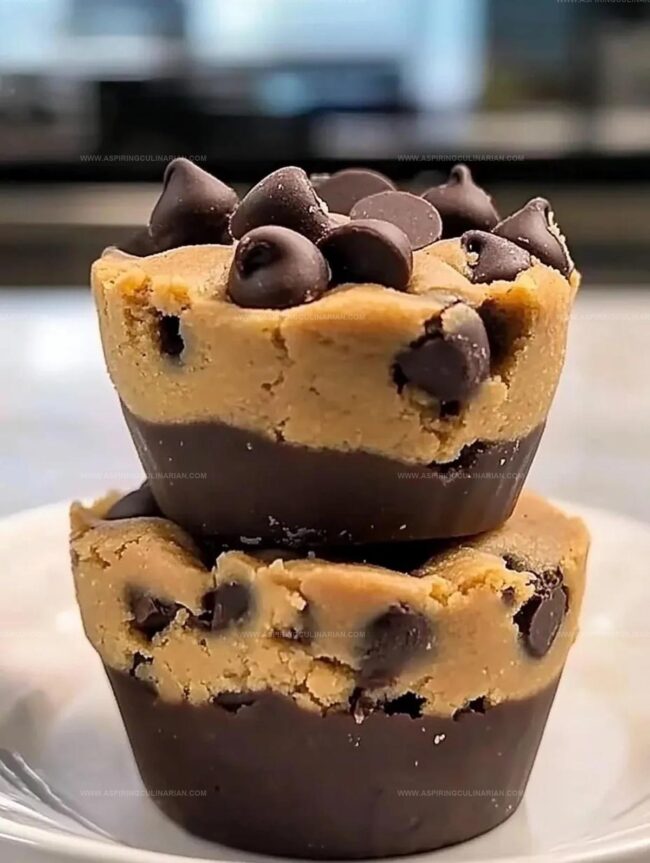
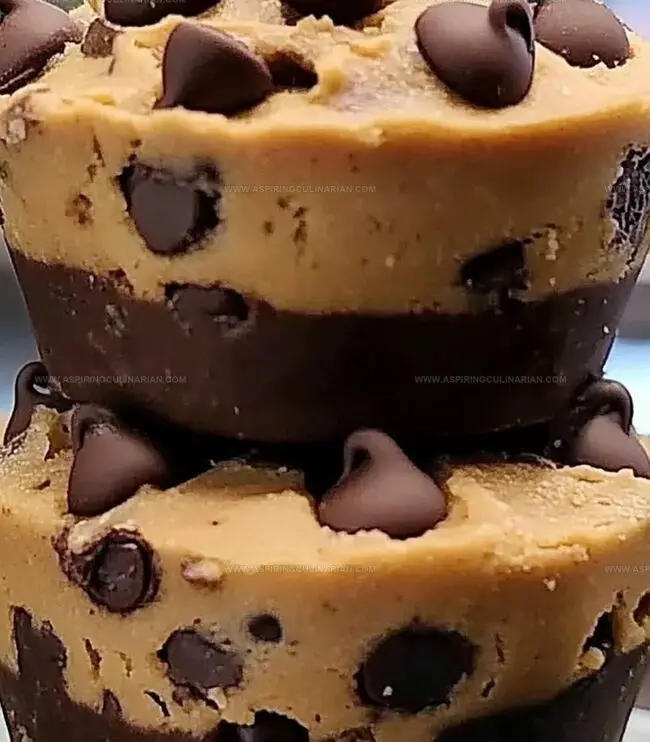
Soft, chewy cookies reach new heights with these decadent peanut butter chocolate chip cookie cups that blend two beloved flavors into one irresistible treat.
Nestled in a mini muffin tin, each cookie cup promises a delightful surprise with every bite.
The rich, creamy peanut butter melds perfectly with melted chocolate chips, creating a heavenly combination that melts in your mouth.
Compact and easy to serve, these miniature desserts are ideal for potlucks, parties, or quiet moments of indulgence.
The crisp edges and gooey center make these cookie cups a true crowd-pleaser that disappears quickly from any dessert table.
Bakers of all skill levels can master this simple yet impressive recipe that transforms classic cookie ingredients into something extraordinary.
One taste, and you’ll be hooked on these irresistible little bites of pure comfort.
Peanut Butter Chocolate Chip Cookie Cups Favorite Treat Revealed
Cookie Cup Ingredients You’ll Want Ready
Cookie Dry Ingredients:Fat and Sweet Base:Binding and Flavor Enhancers:Peanut Butter Cookie Cups Made Simple
Step 1: Warm Up the Oven
Fire up your oven to 350F (175C).
Grab a 12-cup muffin tin and give it a light coating of cooking spray or nestle in some paper liners.
Step 2: Blend Dry Components
Grab a medium bowl and whisk together:Mix until everything looks evenly distributed.
Step 3: Whip Butter and Sugars
In a large bowl, grab your mixer and beat together:Blend until the mixture looks smooth and fluffy, about 2-3 minutes of mixing.
Step 4: Introduce Peanut Butter and Friends
Drop in the peanut butter and mix thoroughly.
Next, add the egg and vanilla extract.
Keep beating until the mixture looks light and airy.
Step 5: Unite Wet and Dry Worlds
Slowly pour the dry ingredients into the wet mixture.
Mix on low speed just until everything comes together.
Don’t go crazy with mixing – you want tender cookies!
Step 6: Sprinkle Chocolate Magic
Fold in most of the chocolate chips, saving a handful for topping.
Use a spatula to gently incorporate them.
Step 7: Fill Cookie Homes
Use a cookie scoop to divide the dough into muffin cups, filling each about 3/4 full.
Sprinkle the remaining chocolate chips on top of each cup.
Step 8: Bake to Perfection
Slide the muffin tin into the oven and bake for 12-15 minutes.
Look for golden brown edges and centers that are still slightly soft.
Step 9: Let Them Rest
Pull the tin out of the oven and let the cookie cups chill in the tin for 10 minutes.
This helps them set up nicely.
Then transfer to a wire rack to cool completely.
Step 10: Enjoy the Deliciousness
Serve these beauties warm for melty chocolate goodness or at room temperature for a chewy treat.
Want to level up?
Add a scoop of vanilla ice cream or drizzle with caramel sauce.
Tips For Baking Cookie Cups Well

Cookie Cup Variations For Every Taste
Serving Peanut Butter Cookie Cups Warm
Storing Cookie Cups For Best Results
FAQs
Yes, crunchy peanut butter works perfectly and adds extra texture to the cookie cups.
Generously grease the muffin tin or use high-quality non-stick paper liners to ensure easy removal.
Absolutely! You can swap chocolate chips with milk, dark, or white chocolate chips based on your preference.
Replace all-purpose flour with a gluten-free flour blend to make the recipe suitable for gluten-sensitive individuals.
Print
Peanut Butter Chocolate Chip Cookie Cups Recipe
- Total Time: 30 minutes
- Yield: 24 1x
Description
Irresistible peanut butter chocolate chip cookie cups melt hearts with their perfect blend of rich chocolate and creamy peanut butter. Sweet morsels nestled in buttery cookie shells promise pure dessert bliss for cookie enthusiasts craving indulgent comfort.
Ingredients
Main Ingredients:
- 1 1/4 cups all-purpose flour
- 1/2 cup unsalted butter, softened
- 1/2 cup brown sugar
- 1/2 cup peanut butter (creamy or chunky)
- 1 large egg
- 1 cup chocolate chips
Binding and Flavor Enhancers:
- 1/2 teaspoon baking soda
- 1/4 teaspoon salt
- 1 teaspoon vanilla extract
- 1/4 cup granulated sugar
Optional Serving Suggestions:
- Vanilla ice cream
- Melted chocolate for drizzling
- Caramel sauce for drizzling
Instructions
- Prepare a 12-cup muffin tin by greasing or lining with paper liners. Heat the oven to 350F (175C).
- Combine flour, baking soda, and salt in a medium bowl, whisking thoroughly to ensure even distribution.
- Using an electric mixer, cream butter with brown and granulated sugars until smooth and fluffy, approximately 2-3 minutes.
- Incorporate peanut butter into the butter-sugar mixture, blending until fully integrated. Mix in egg and vanilla extract until the batter becomes light and airy.
- Slowly integrate dry ingredients into wet mixture, mixing on low speed until just combined. Avoid overmixing to maintain a tender texture.
- Delicately fold most of the chocolate chips into the dough, reserving a small portion for topping each cookie cup.
- Distribute cookie dough evenly among muffin cups, filling each about three-quarters full. Sprinkle remaining chocolate chips on top of each cup.
- Bake in preheated oven for 12-15 minutes, watching for golden-brown edges and slightly soft centers.
- Allow cookie cups to rest in the muffin tin for 10 minutes, enabling them to set properly. Carefully transfer to a wire rack for complete cooling.
- Serve while warm for a molten chocolate experience or at room temperature for a chewier consistency. Optional: Enhance with a scoop of vanilla ice cream or a drizzle of chocolate or caramel sauce.
Notes
- Swap out all-purpose flour with gluten-free flour blend for celiac or gluten-sensitive individuals, ensuring the same delightful texture and taste.
- Use natural peanut butter with no added sugars to reduce overall sweetness and create a more balanced flavor profile.
- Try alternative mix-ins like chopped nuts, white chocolate chips, or dried fruit to customize the cookie cups and add unexpected crunch.
- For a healthier version, replace half the butter with mashed banana or applesauce to reduce fat content while maintaining moisture and tenderness.
- Prep Time: 15 minutes
- Cook Time: 15 minutes
- Category: Desserts, Snacks
- Method: Baking
- Cuisine: American
Nutrition
- Serving Size: 24
- Calories: 150
- Sugar: 8 g
- Sodium: 80 mg
- Fat: 7 g
- Saturated Fat: 3.5 g
- Unsaturated Fat: 3.5 g
- Trans Fat: 0 g
- Carbohydrates: 20 g
- Fiber: 1 g
- Protein: 2 g
- Cholesterol: 15 mg
Lena Martinez
Contributing Writer & Culinary Educator
Expertise
Southwestern and Latin American cuisines, Vegetarian and plant-based recipe development, Culinary education and community outreach
Education
Santa Fe Community College, Santa Fe, NM
Certificate in Culinary Arts
Emphasized Southwestern cuisine and sustainable cooking practices
Lena grew up surrounded by the colors, spices, and traditions of the Southwest – flavors that sparked her love for bold, honest cooking. After earning her Culinary Arts certificate at Santa Fe Community College, she made it her mission to teach home cooks how to create flavorful, plant-powered meals without the fuss.
Her recipes are packed with vibrant ingredients, simple steps, and the kind of heart that turns a regular meal into something you’ll want to share. Outside the kitchen, Lena spends her time wandering farmers’ markets, trading family recipes, and helping young chefs find their voice through food.