Spooky-Fun Peanut Butter Spider Cookies Halloween Recipe
Creepy crawly peanut butter spider cookies weave a delightful web of sweet Halloween magic that captures childhood imagination.
Spooky desserts often seem complicated, but these playful treats come together with surprising ease.
Kids absolutely adore creating these eight-legged edible creatures during seasonal baking adventures.
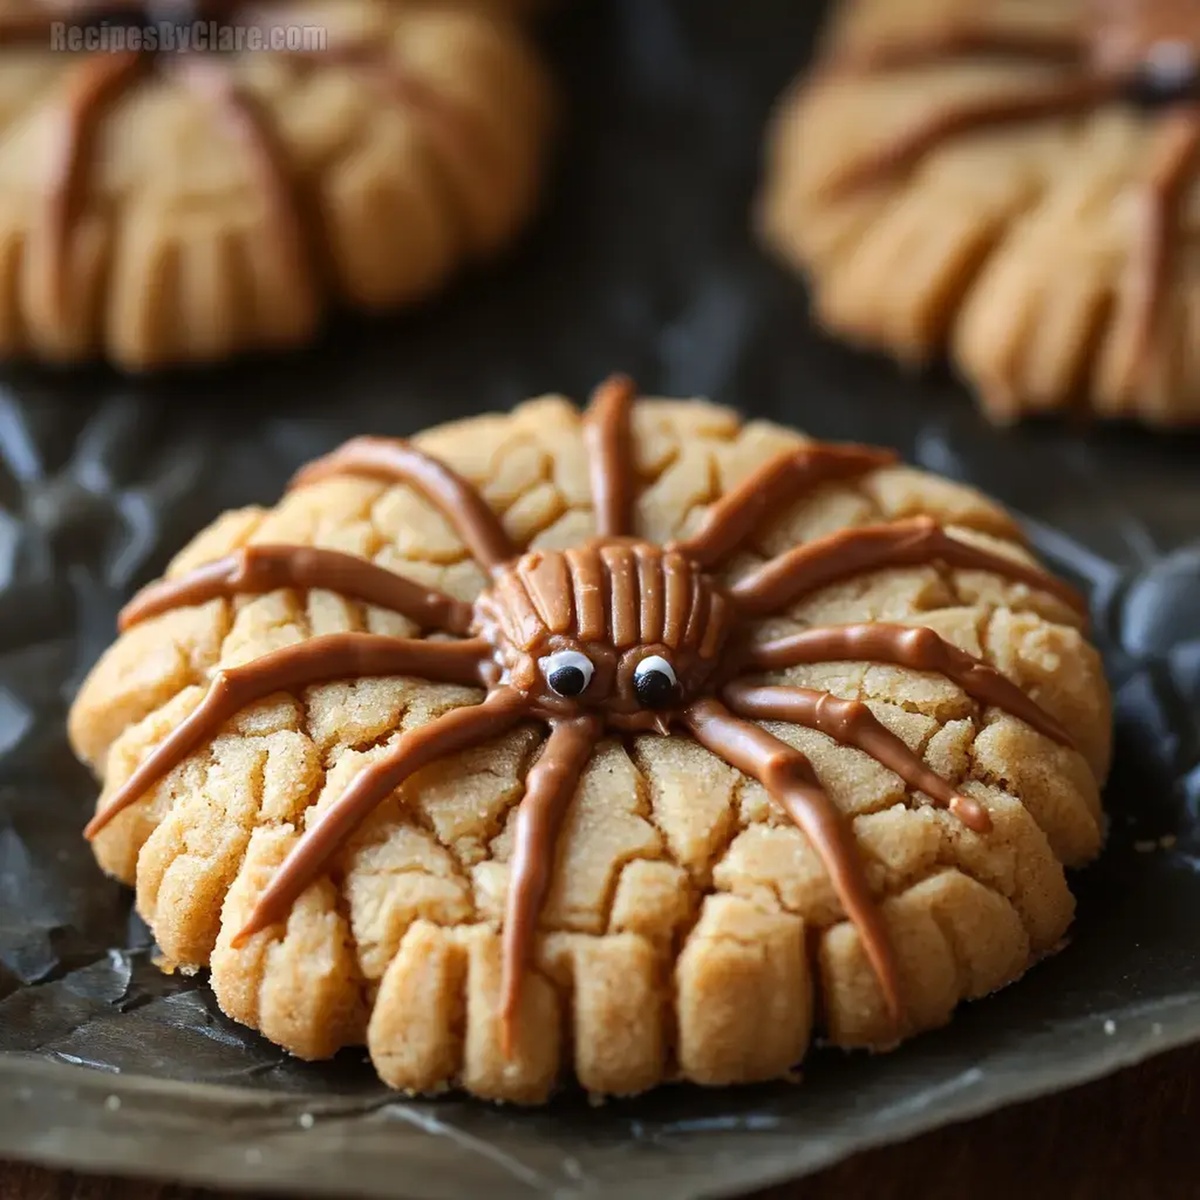
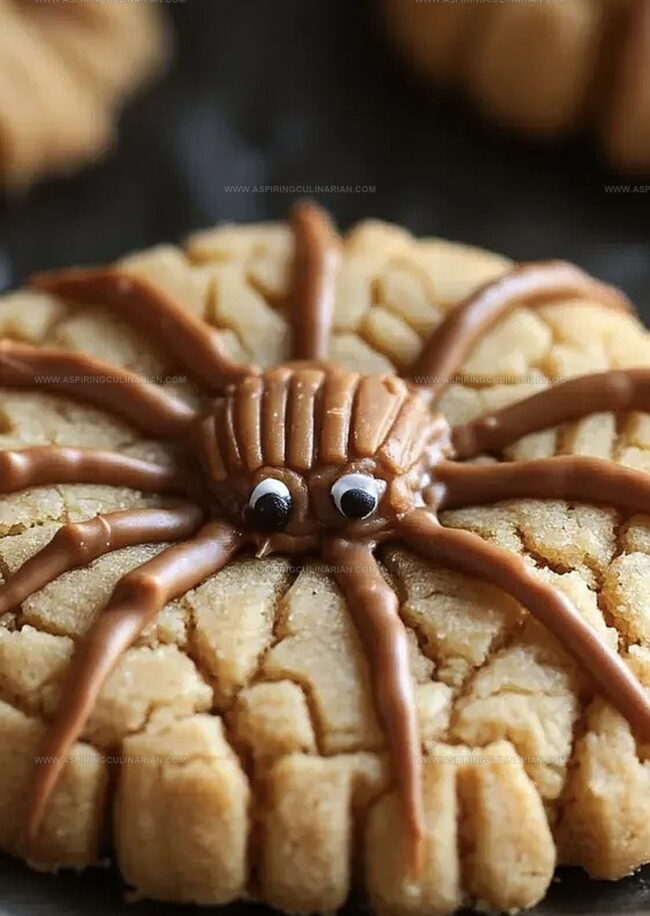
Chocolate legs and candy eyes transform simple cookies into whimsical monsters that spark giggles and excitement.
Decorating becomes a fun family activity where everyone can unleash their creative spirit.
Simple ingredients from your pantry make these spooky treats accessible and entertaining.
Bake these delightful cookies and watch faces light up with Halloween wonder.
Peanut Butter Spider Cookies: Spooky & Sweet
What You Need for PB Spider Cookies
Base Ingredients:Dry Ingredients:Decorative Ingredients:Bake Up Spooky Peanut Butter Cookies

Step 1: Prepare Baking Station
Grab your baking sheet and line it with parchment paper.
Turn the oven to a toasty 350F (175C) so it’s ready for cookie magic.
Step 2: Create Creamy Base
In a large mixing bowl, blend together:Whip these ingredients until they become light and fluffy like a cloud.
Step 3: Incorporate Egg
Crack an egg into the creamy mixture and stir until everything is perfectly combined.
Step 4: Mix Dry Ingredients
In a separate bowl, combine:Whisk these ingredients until they’re evenly blended.
Step 5: Combine Wet and Dry Mixtures
Slowly fold the dry ingredients into the wet mixture.
Stir gently until a smooth dough forms.
Step 6: Shape Cookie Balls
Roll the dough into small, round balls about 1 inch in diameter.
Place them carefully on the prepared baking sheet.
Step 7: Bake to Perfection
Slide the baking sheet into the oven and bake for 8-10 minutes.
Look for a light golden color around the edges.
Step 8: Add Chocolate Centers
While the cookies are still warm, gently press a peanut butter cup into the center of each cookie.
Step 9: Create Spooky Spider Design
Melt some chocolate and use it to pipe thin legs extending from each cookie.
Attach tiny candy eyes to complete the creepy-cute spider look.
Step 10: Cool and Serve
Let the cookies cool completely on a wire rack.
Watch as your spooky spider treats become the star of the Halloween party!
Spider Cookie Pro Tips
Fun Ways to Remix Spider Cookies
Serve Spider Cookies for Halloween
Storage for Spooky PB Cookies
FAQs
Peanut butter cups add a rich, creamy center and create the spider’s body, making the cookies more decadent and visually interesting.
Yes, you can use melted dark, milk, or white chocolate to pipe the spider legs, depending on your preference and what you have available.
Use a piping bag or a small ziplock bag with a corner snipped off to create thin, precise chocolate lines for the spider legs.
Absolutely! Kids will love helping decorate the cookies with candy eyes and chocolate legs, making it a fun baking activity.
Print
Peanut Butter Spider Cookies Halloween Recipe
- Total Time: 30 minutes
- Yield: 24 1x
Description
Spooky Halloween peanut butter spider cookies spin delightful terror onto classic cookie comfort. Creepy-crawly chocolate legs and googly eyes turn ordinary treats into festive party delicacies you’ll devour with gleeful Halloween spirit.
Ingredients
Main Ingredients:
- 1/2 cup (118 ml) creamy peanut butter
- 1/2 cup (113 grams) unsalted butter, softened
- 1/2 cup (100 grams) granulated sugar
- 1/2 cup (110 grams) brown sugar, packed
- 1 large egg
- 1 1/4 cups (156 grams) all-purpose flour
Leavening and Seasoning:
- 3/4 teaspoon baking soda
- 1/4 teaspoon salt
Decorative and Finishing Ingredients:
- 24 mini chocolate peanut butter cups
- 48 candy eyes
- 1/4 cup (45 grams) chocolate chips, melted (for piping legs)
Instructions
- Prepare the oven at 350°F (175°C) and line a baking sheet with parchment paper for optimal cookie performance.
- In a mixing bowl, blend peanut butter, butter, and sugars until the mixture achieves a light, airy consistency.
- Incorporate the egg into the mixture, stirring until thoroughly integrated.
- Separately combine flour, baking soda, and salt in a secondary bowl, ensuring even distribution of dry ingredients.
- Gradually fold the dry ingredient mixture into the wet ingredients, creating a uniform dough.
- Craft uniform dough balls approximately 1-inch in diameter, strategically positioning them on the prepared baking sheet.
- Roast the cookies for 8-10 minutes, watching for a delicate golden hue. Remove and allow brief cooling.
- While cookies remain warm, gently nestle a peanut butter cup into the center of each cookie, creating a delectable core.
- Transform the cookies into playful spiders by piping melted chocolate as intricate legs and carefully attaching candy eyes for whimsical character.
Notes
- Swap peanut butter for sunflower seed butter to make these cookies nut-free and allergy-friendly for school or parties.
- Chill the dough for 30 minutes before baking to prevent spreading and create perfectly round spider cookies.
- Use dairy-free chocolate and vegan butter alternatives to transform this recipe into a plant-based Halloween treat that everyone can enjoy.
- If making ahead, store cookies in an airtight container at room temperature for up to 5 days, keeping chocolate decorations intact and maintaining their delightful crunch.
- Prep Time: 20 minutes
- Cook Time: 10 minutes
- Category: Desserts, Snacks
- Method: Baking
- Cuisine: American
Nutrition
- Serving Size: 24
- Calories: 159 kcal
- Sugar: 9 g
- Sodium: 98 mg
- Fat: 11 g
- Saturated Fat: 3 g
- Unsaturated Fat: 7 g
- Trans Fat: 0.1 g
- Carbohydrates: 14 g
- Fiber: 1 g
- Protein: 4 g
- Cholesterol: 27 mg
Nathaniel Brooks
Founder & Recipe Developer
Expertise
Farm-to-table cuisine, Seasonal recipe development, Culinary storytelling
Education
Ivy Tech Community College – Indianapolis, IN
Culinary Arts / Hospitality Administration & Events
Focused on hands-on training in classical and modern culinary techniques.
Nathaniel’s story starts in the foothills of the Appalachian Mountains, where farm stands, backyard gardens, and old family recipes shaped his love for real food. After graduating from Ivy Tech Community College in Indianapolis, he spent years working in farm-to-table kitchens, learning how to turn local, seasonal ingredients into something memorable.
Today, Nathaniel pours that same spirit into every single recipe on Aspiring Culinarian – recipes that feel real, comforting, and connected to the land. When he’s not in the kitchen, you’ll find him foraging wild herbs, chasing sunsets with his camera, or writing about the flavors that shaped his roots.