Cozy Homemade Pumpkin Hand Pies Recipe: Fall’s Sweet Comfort
Crisp autumn afternoons beckon for a delightful pumpkin hand pies adventure that fills your kitchen with warmth and nostalgia.
Sweet aromas drift through the house, promising comfort in every delicate bite.
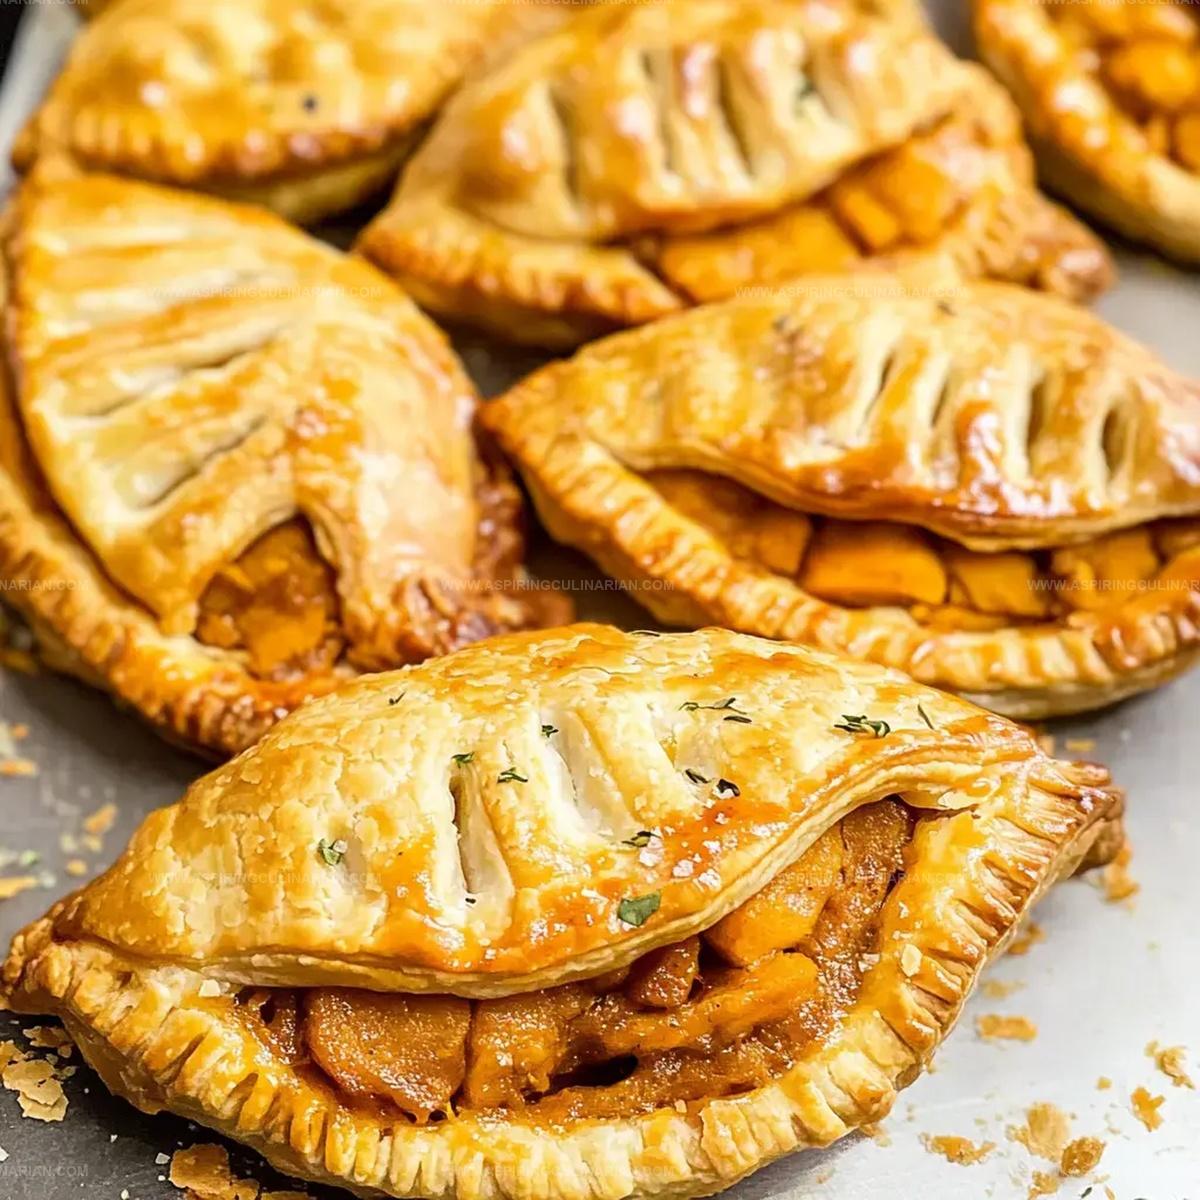
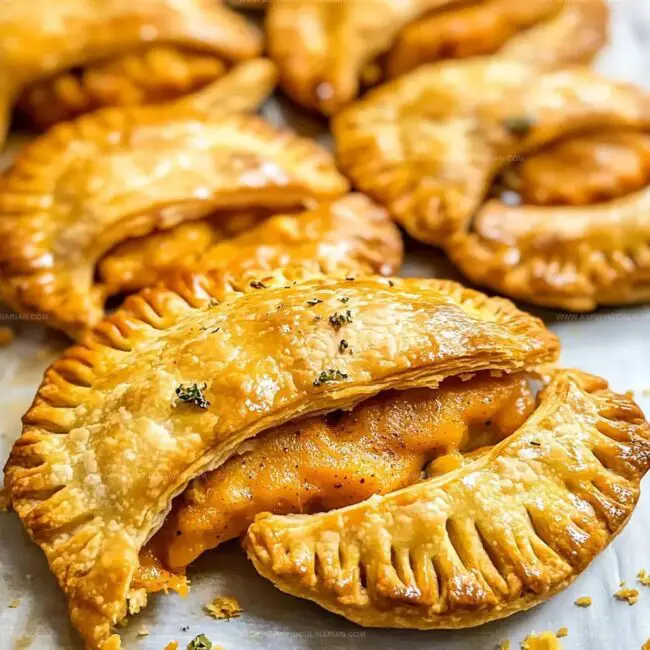
Compact and perfectly portioned, these handheld treats offer a delicious twist on traditional pie.
Delicate pastry envelops rich, spiced pumpkin filling that melts in your mouth.
Each golden-edged morsel delivers a symphony of seasonal flavors that dance across your palate.
Minimal effort yields maximum satisfaction with this charming dessert that celebrates fall’s most beloved ingredient.
Whip up these irresistible hand pies and watch smiles bloom around your table.
Mini Pumpkin Pies: Seasonal Stars
What Goes Into Mini Pumpkin Pies
Main Ingredients:Sweeteners and Spices:Binding and Finishing Ingredients:Baking Mini Pumpkin Pies Easily
Step 1: Warm Up the Oven
Preheat the oven to 400°F.
Cover baking sheets with parchment paper to prevent sticking and make cleanup easier.
Step 2: Smooth Out the Pastry
Gently roll out pie crusts on a clean surface, carefully removing any wrinkles or folds to ensure even baking.
Step 3: Create Cute Pie Shapes
Use a 3-4 inch round cookie cutter to cut adorable pumpkin-shaped pie bases.
Place the cut shapes on a plate and refrigerate to keep them firm.
Step 4: Whip Up the Delicious Filling
In a mixing bowl, combine:Stir until the mixture is smooth and well-blended.
Step 5: Fill the Pie Bases
Spoon 2-3 tablespoons of pumpkin filling onto each pastry shape, leaving a small border around the edges for sealing.
Step 6: Top with Ventilated Crusts
Cut small slits or decorative patterns in the top crusts to allow steam to escape during baking.
Step 7: Create a Golden Seal
Whisk together an egg wash by mixing egg with a splash of water.
Brush the edges of the bottom crusts with the egg mixture.
Step 8: Crimp and Close
Place the vented top crusts over the filled bottoms.
Use a fork to press and seal the edges, creating a beautiful crimped border.
Step 9: Add Final Touches
Brush the tops of the hand pies with egg wash.
Sprinkle with a mixture of granulated sugar and additional pumpkin pie spice for extra flavor and shine.
Step 10: Bake and Enjoy
Bake the hand pies for 15-20 minutes until they turn a gorgeous golden brown.
Let them rest for 5 minutes before serving to allow the filling to set.
Pumpkin Pie Tips for Mini Perfection
Mini Pies: New Flavor Ideas
Serving Up Mini Pumpkin Pies
Mini Pumpkin Pies: How to Store
FAQs
These mini pies are surprisingly easy! The process involves simple steps like cutting pie crust shapes, mixing a quick filling, and using basic kitchen tools like a cookie cutter and fork.
Yes! You can prepare the pie shapes and filling in advance, then assemble and bake when ready. They’re perfect for prepping before a gathering or holiday event.
Store-bought refrigerated pie crusts work perfectly and save time. If you prefer, homemade pie crust can also be used – just ensure it’s rolled thin and can be easily cut into shapes.
Print
Pumpkin Hand Pies Recipe
- Total Time: 50 minutes
- Yield: 6 1x
Description
Spiced Pumpkin Hand Pies deliver autumn’s warmth in portable, golden pastry pockets packed with rich seasonal flavors. Crisp edges and creamy filling invite sweet memories of harvest celebrations, drawing hungry friends close for delightful shared moments.
Ingredients
Main Ingredients:
- 1 cup pumpkin puree
- 2 refrigerated pie crusts
- 1 egg
Filling Ingredients:
- 1/3 cup packed brown sugar
- 2 tablespoons heavy cream
- 1 1/2 teaspoons pumpkin pie spice
- 1/4 teaspoon kosher salt
Topping Ingredients:
- 2 tablespoons coarse sanding sugar
- 1/2 teaspoon pumpkin pie spice
- 1 teaspoon water
Instructions
- Warm the oven to 400°F and arrange parchment paper on baking sheets for smooth release.
- Gently smooth out pie crusts, eliminating any visible wrinkles or folds.
- Use a 3-4 inch circular cutter to create precise pumpkin-shaped pastry rounds, then refrigerate to maintain shape.
- Combine pumpkin puree with brown sugar, heavy cream, warming spices, and a hint of salt in a smooth, consistent mixture.
- Carefully spoon 2-3 tablespoons of pumpkin filling onto each pastry round, maintaining a clean border for sealing.
- Craft small decorative vents on top crusts to allow steam escape during baking.
- Create an egg wash by whisking egg with water, then delicately brush along pastry edges for a golden seal.
- Position vented top crusts over filled rounds, pressing edges together using fork tines to create decorative crimped borders.
- Generously brush tops with egg wash, then sprinkle with a delicate combination of sugar and aromatic spices.
- Bake for 15-20 minutes until achieving a rich, golden-brown color, then allow mini pies to rest and set for 5 minutes before serving.
Notes
- Adjust Thickness carefully when rolling pie crusts to ensure even baking and prevent cracking.
- Choose Fresh pumpkin puree for richer, more authentic flavor compared to canned alternatives.
- Try Spices by adding nutmeg or cardamom to enhance the traditional pumpkin pie taste profile.
- Freeze Extra mini pies for quick desserts, storing them in airtight containers up to one month before serving.
- Prep Time: 30 minutes
- Cook Time: 20 minutes
- Category: Desserts, Snacks
- Method: Baking
- Cuisine: American
Nutrition
- Serving Size: 6
- Calories: 203 kcal
- Sugar: 14 g
- Sodium: 154 mg
- Fat: 10 g
- Saturated Fat: 4 g
- Unsaturated Fat: 5 g
- Trans Fat: 0.2 g
- Carbohydrates: 27 g
- Fiber: 2 g
- Protein: 3 g
- Cholesterol: 55 mg
Nathaniel Brooks
Founder & Recipe Developer
Expertise
Farm-to-table cuisine, Seasonal recipe development, Culinary storytelling
Education
Ivy Tech Community College – Indianapolis, IN
Culinary Arts / Hospitality Administration & Events
Focused on hands-on training in classical and modern culinary techniques.
Nathaniel’s story starts in the foothills of the Appalachian Mountains, where farm stands, backyard gardens, and old family recipes shaped his love for real food. After graduating from Ivy Tech Community College in Indianapolis, he spent years working in farm-to-table kitchens, learning how to turn local, seasonal ingredients into something memorable.
Today, Nathaniel pours that same spirit into every single recipe on Aspiring Culinarian – recipes that feel real, comforting, and connected to the land. When he’s not in the kitchen, you’ll find him foraging wild herbs, chasing sunsets with his camera, or writing about the flavors that shaped his roots.