
Heavenly Raspberry Thumbprint Cookies Recipe for Sweet Moments
Crafting delightful raspberry thumbprint cookies brings pure joy to your baking adventure.
Sweet memories dance through kitchen spaces while mixing ingredients.
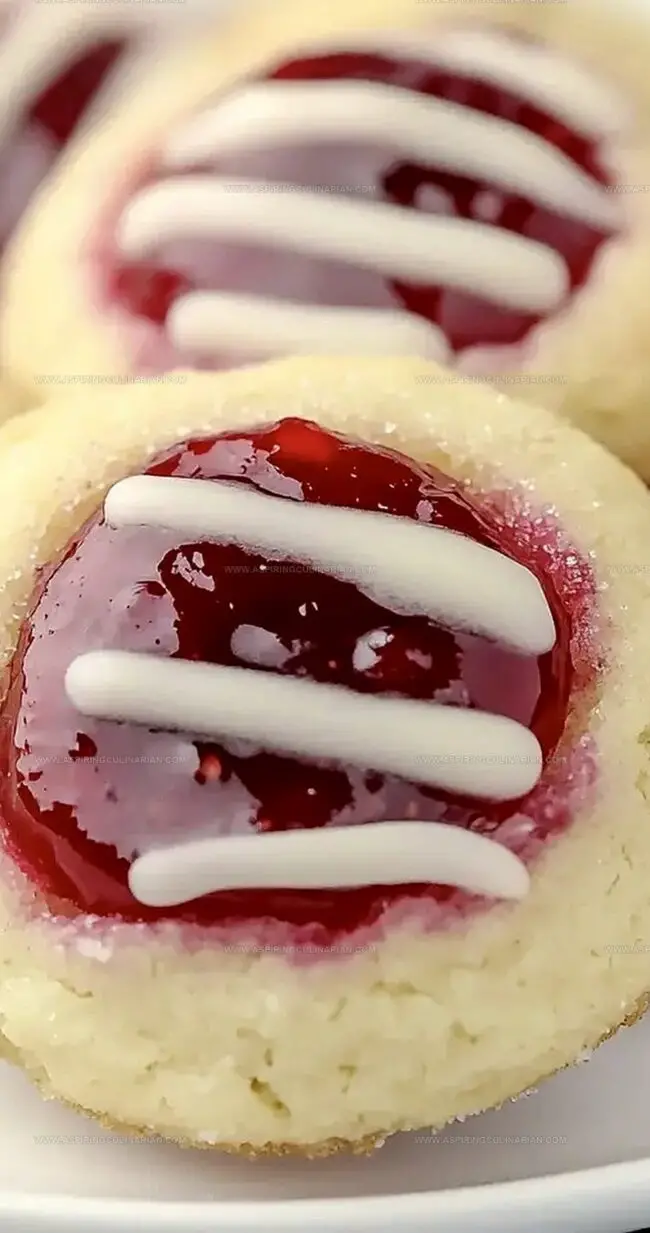
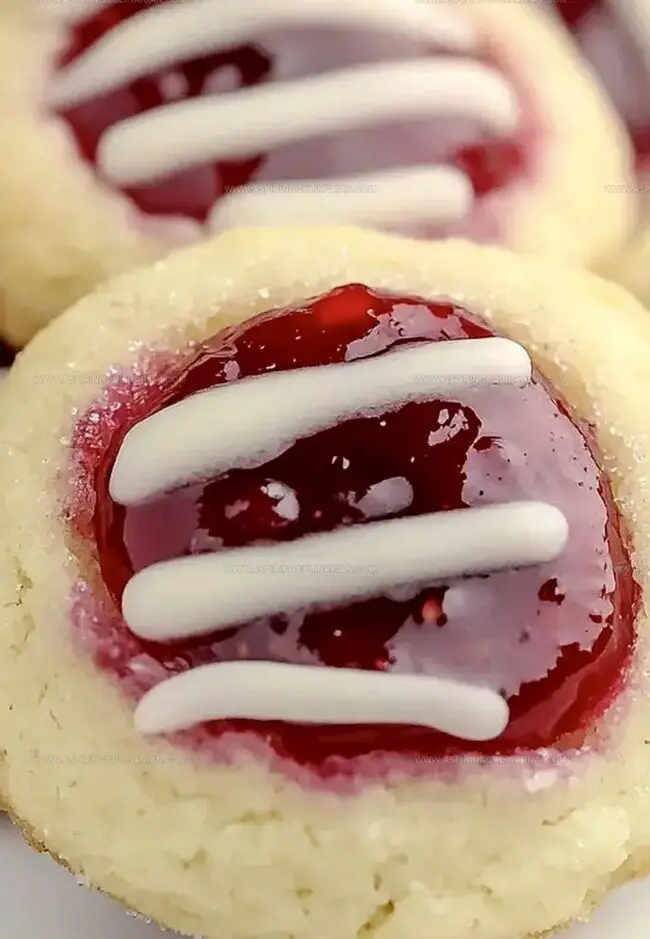
Soft, buttery dough becomes a canvas for vibrant raspberry jam.
Delicate indentations create perfect pockets of fruity goodness.
Clusters of golden-edged cookies promise delectable moments of pure happiness.
These classic treats connect generations through simple, heartwarming baking.
You’ll want to savor every crumbly, sweet bite of these irresistible cookies.
Raspberry Thumbprint Cookies – Fruity Jam Centered Goodness
Ingredients List for Raspberry Thumbprint Cookies
Base Ingredients:Dry Ingredients:Filling and Topping Ingredients:Baking Steps for Soft Raspberry Thumbprint Cookies
Step 1: Whip Butter Mixture
In a spacious mixing bowl, blend softened butter, sugar, and vanilla extract until the mixture becomes airy and silky smooth.
Use an electric mixer to achieve a fluffy consistency that looks light and creamy.
Step 2: Incorporate Egg
Crack the egg into the butter mixture and beat thoroughly until completely blended and uniform in texture.
Step 3: Combine Dry Components
Grab a separate bowl and gently whisk together:Slowly fold the dry ingredients into the butter mixture, stirring until just combined.
Avoid overmixing to keep the dough tender.
Step 4: Refrigerate Dough
Cover the dough and place it in the refrigerator for one hour.
Chilling helps the cookies maintain their shape and enhances flavor development.
Step 5: Prepare Baking Station
Heat the oven to 350F.
Line baking sheets with parchment paper for easy cookie removal and clean-up.
Step 6: Prepare Rolling Station
Pour remaining sugar into a shallow dish for coating cookie dough.
Step 7: Shape Cookies
Remove chilled dough and roll into small balls.
Gently roll each ball in sugar, then arrange on baking sheets with space between them.
Step 8: Create Cookie Centers
Press your thumb or the handle of a wooden spoon into each cookie ball, creating a small well for filling.
Step 9: Bake Cookies
Slide the baking sheets into the oven and bake until cookie edges turn golden brown, approximately 13-16 minutes.
Step 10: Add Raspberry Filling
Warm raspberry jam in a small bowl.
Carefully spoon the melted jam into the center of each slightly cooled cookie.
Step 11: Drizzle Icing
Prepare a quick glaze by mixing:Stir until smooth, then delicately drizzle over the cooled cookies for a beautiful finishing touch.
Tips for Neat Thumbprints and Jam Filling
Raspberry Cookie Variations With Citrus or Chocolate
Arranging Thumbprint Cookies for Tea or Dessert
Storage for Raspberry Thumbprint Cookies
FAQs
Chilling helps prevent spreading and makes the cookies hold their shape better during baking.
Yes, you can substitute raspberry jam with strawberry, apricot, or any other flavor you prefer.
Look for lightly browned edges and a set appearance. They should be slightly firm but not dark.
If the dough is too soft, return it to the refrigerator for an additional 15-30 minutes to firm up before rolling.
Print
Raspberry Thumbprint Cookies Recipe
- Total Time: 1 hour 30 minutes
- Yield: 24 1x
Description
Sweet raspberry thumbprint cookies bring European bakery charm to home kitchens, offering delicate buttery shortbread with jewel-like raspberry jam centers. Crisp edges and tender crumb promise delightful moments of pure comfort you’ll savor with each delectable bite.
Ingredients
Main Ingredients:
- 2 cups all-purpose flour
- 1 cup butter, softened
- 3/4 cup granulated sugar, divided
- 1 large egg
- 2/3 cup seedless raspberry jam
Leavening and Seasoning:
- 1 teaspoon baking powder
- 1/4 teaspoon salt
- 1 teaspoon vanilla extract
Icing and Finishing:
- 1/2 cup confectioners’ sugar
- 1/2 teaspoon vanilla extract
- 1 1/2 teaspoons water
Instructions
- In a spacious mixing bowl, transform softened butter, granulated sugar, and vanilla extract into a cloud-like, airy mixture by vigorously beating for 2-3 minutes.
- Incorporate the egg, blending thoroughly until seamlessly integrated with the butter mixture.
- Separately whisk flour, baking powder, and salt, then gently fold these dry ingredients into the butter mixture, stirring until just combined.
- Refrigerate the dough for one hour to enhance flavor and texture, allowing ingredients to meld together.
- Heat the oven to 350F (175C) and prepare baking sheets with parchment paper for optimal cookie performance.
- Pour remaining sugar into a shallow dish for coating the cookie dough.
- Craft chilled dough into uniform 1-inch spheres, generously rolling each ball through the sugar and positioning them 2 inches apart on prepared sheets.
- Create a gentle indentation in each cookie’s center using your thumb or a wooden spoon handle, forming a perfect pocket for jam.
- Bake 13-16 minutes until edges transform into a delicate golden brown, allowing cookies to rest briefly on the baking sheet after removing from oven.
- Gently warm raspberry jam, then carefully spoon the vibrant filling into each cookie’s carefully crafted center.
- Whisk confectioners’ sugar, vanilla extract, and water into a silky smooth icing, elegantly drizzling over completely cooled cookies.
Notes
- Chilling the dough helps prevent spreading and creates a more structured cookie with a better texture.
- Use room temperature ingredients to ensure smooth mixing and consistent cookie results.
- For gluten-free version, swap wheat flour with almond or gluten-free blend, which adds nutty flavor and maintains cookie structure.
- Try different jam flavors like apricot, strawberry, or mixed berry to customize the thumbprint cookies to personal taste preferences.
- Prep Time: 1 hour 15 minutes
- Cook Time: 15 minutes
- Category: Desserts, Snacks
- Method: Baking
- Cuisine: American
Nutrition
- Serving Size: 24
- Calories: 112 kcal
- Sugar: 9 g
- Sodium: 44 mg
- Fat: 6 g
- Saturated Fat: 3.7 g
- Unsaturated Fat: 2.3 g
- Trans Fat: 0.2 g
- Carbohydrates: 15 g
- Fiber: 0.4 g
- Protein: 1.3 g
- Cholesterol: 20 mg
Nathaniel Brooks
Founder & Recipe Developer
Expertise
Farm-to-table cuisine, Seasonal recipe development, Culinary storytelling
Education
Ivy Tech Community College – Indianapolis, IN
Culinary Arts / Hospitality Administration & Events
Focused on hands-on training in classical and modern culinary techniques.
Nathaniel’s story starts in the foothills of the Appalachian Mountains, where farm stands, backyard gardens, and old family recipes shaped his love for real food. After graduating from Ivy Tech Community College in Indianapolis, he spent years working in farm-to-table kitchens, learning how to turn local, seasonal ingredients into something memorable.
Today, Nathaniel pours that same spirit into every single recipe on Aspiring Culinarian – recipes that feel real, comforting, and connected to the land. When he’s not in the kitchen, you’ll find him foraging wild herbs, chasing sunsets with his camera, or writing about the flavors that shaped his roots.