The Perfect Red Velvet Cookie Sandwiches Recipe for Sweet Tooths
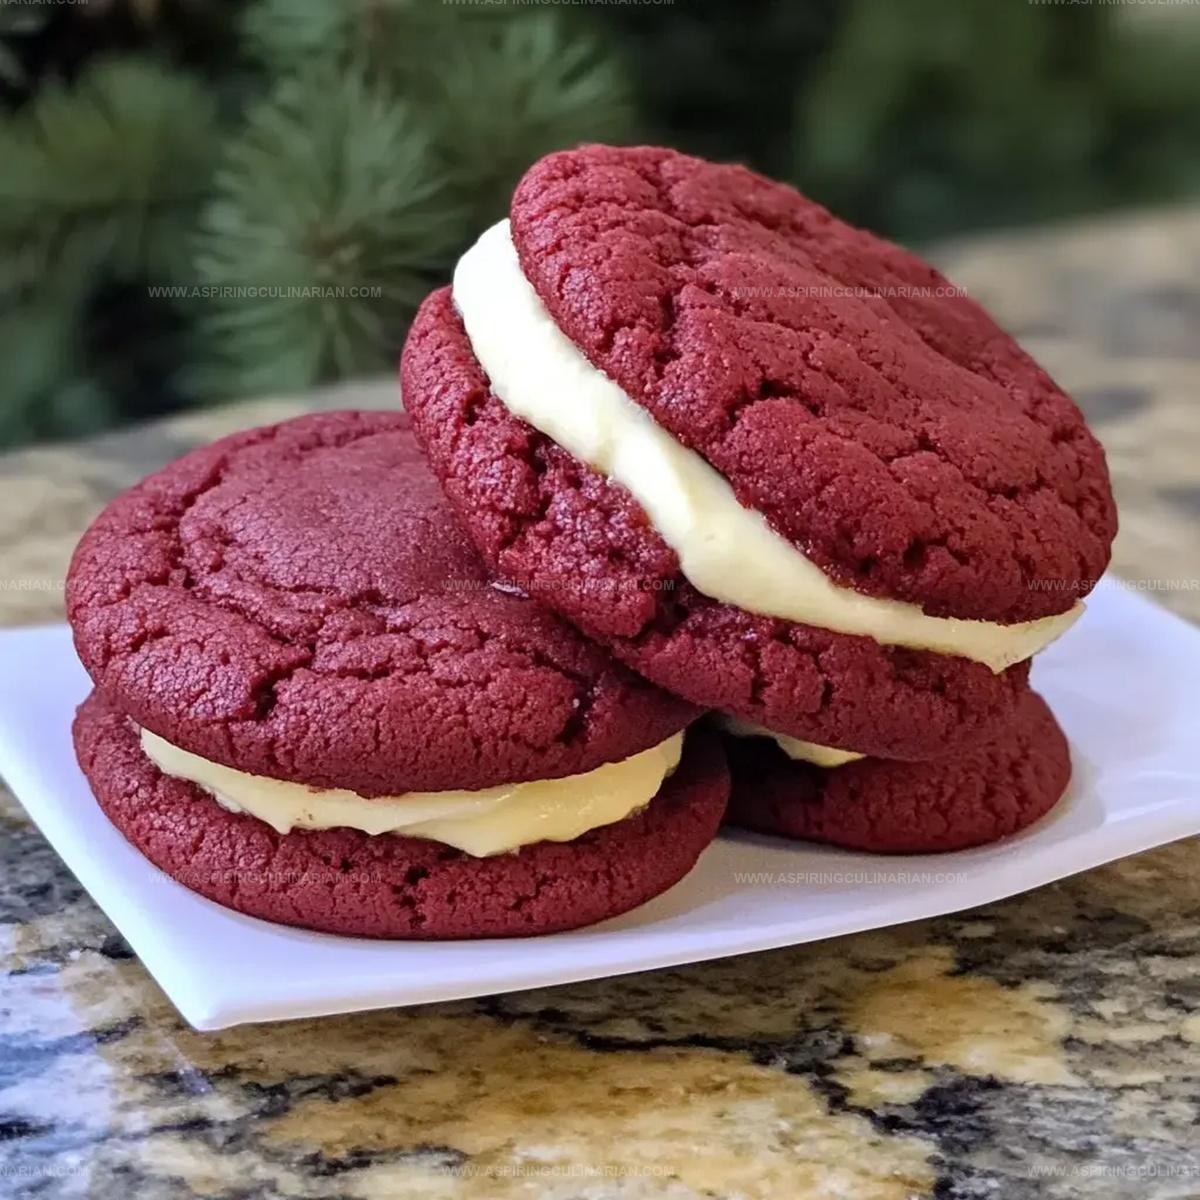
Sweet, soft, and utterly irresistible, these red velvet cookie sandwiches dance between decadent chocolate and creamy filling.
Tender cookies with a vibrant red velvet cookie sandwiches recipe blend rich cocoa and subtle tang.
cream cheese frosting nestles between each delicate layer, creating a dessert that melts in your mouth.
The deep crimson color catches everyone’s eye, promising a treat that’s as beautiful as it is delicious.
Each bite delivers a perfect balance of velvety texture and sweet, subtle flavor.
Bakers and dessert enthusiasts will fall in love with this show-stopping confection that elevates ordinary cookies to something truly extraordinary.
Prepare to impress with these stunning, crowd-pleasing treats that are sure to become a new favorite.
Why Cream Cheese Stuffed Cookies Taste So Good
What’s Inside Cream Cheese Stuffed Cookies
Main Ingredients:Wet Ingredients:Dry Ingredients:Filling Ingredients:Instructions for Cream Cheese Stuffed Cookies

Step 1: Warm Up the Oven
Preheat the oven to 350°F and line a baking sheet with parchment paper for easy cookie removal.
Step 2: Cream Butter and Sugar
In a large mixing bowl, whip together butter and sugar until the mixture becomes light, fluffy, and creamy.
Step 3: Incorporate Wet Ingredients
Add the egg, buttermilk, and vanilla extract to the butter mixture.
Blend thoroughly until all ingredients are well combined.
Step 4: Add Vibrant Color
Pour in red food coloring and mix until the batter achieves a rich, deep red hue.
Step 5: Prepare Dry Ingredients
In a separate bowl, sift together:Step 6: Merge Wet and Dry Mixtures
Gently fold the dry ingredients into the wet mixture, stirring until just combined.
Avoid overmixing to keep the cookies tender.
Step 7: Shape Cookie Dough
Use a mini ice cream scoop to portion out the dough.
Place cookie balls 2 inches apart on the prepared baking sheet.
Step 8: Smooth Cookie Surfaces
Optionally, roll each dough ball between your palms to create a smoother, more uniform shape.
Step 9: Bake to Perfection
Slide the baking sheet into the oven and bake for 7-8 minutes until edges are set but centers remain soft.
Step 10: Cool Cookie Bases
Allow cookies to rest in the pan for 1-2 minutes, then transfer to a wire cooling rack.
Step 11: Whip Up Cream Cheese Filling
In a clean bowl, blend together:Mix until smooth and creamy.
Step 12: Prepare Filling for Piping
Transfer the cream cheese mixture to a piping bag fitted with a round tip.
Step 13: Create Sandwich Cookies
Once cookies have completely cooled, pipe a generous dollop of cream cheese filling onto one cookie and gently sandwich with another.
Step 14: Chill and Set
Refrigerate the assembled cookies for 3 hours to allow the filling to set and flavors to meld.
Store in the refrigerator.
Cookie Tips for Stuffed Cookie Lovers
Fun Variations for Stuffed Cookie Recipes
Serving Suggestions for Stuffed Cookies
Keeping Cream Cheese Stuffed Cookies Fresh
FAQs
The cookies are done when the edges look set and slightly firm, typically after 7-8 minutes. They might seem slightly soft in the center, but they’ll continue cooking on the hot baking sheet.
Yes, you can prepare the cream cheese filling up to 2 days in advance. Store it in an airtight container in the refrigerator and bring to room temperature before piping.
Buttermilk adds moisture and helps create a tender, soft cookie texture. It also reacts with baking soda to help the cookies rise and become light.
Print
Red Velvet Cookie Sandwiches Recipe
- Total Time: 33 minutes
- Yield: 24 1x
Description
Indulgent red velvet cookie sandwiches bring classic Southern charm to sweet dessert lovers. Creamy cream cheese frosting nestled between rich crimson cookies creates pure bliss for anyone craving delightful homemade treats.
Ingredients
Main Ingredients:
- 1 cup granulated sugar
- 1/2 cup (113 grams) unsalted butter, room temperature
- 1 egg
- 1 1/2 cups (180 grams) all-purpose flour
- 8 ounces (226 grams) cream cheese
- 1 cup powdered sugar
Flavor and Color Enhancers:
- 2 tablespoons buttermilk
- 1/2 teaspoon vanilla extract
- 2 tablespoons red food coloring
- 2 tablespoons unsweetened cocoa powder
Leavening and Seasoning:
- 1/2 teaspoon baking soda
- 1/2 teaspoon salt
- 1/4 cup (57 grams) butter, room temperature
- 1/2 teaspoon vanilla extract
Instructions
- Preheat the oven to 350°F and line a baking sheet with parchment paper for easy cookie removal.
- In a large mixing bowl, cream together sugar and butter until light and fluffy, creating a smooth base for the cookies.
- Incorporate egg, buttermilk, and vanilla extract, blending thoroughly to ensure even distribution of moisture.
- Add red food coloring to achieve the desired vibrant hue, mixing until color is uniform throughout the batter.
- In a separate bowl, whisk together flour, baking soda, salt, and cocoa powder to create a dry ingredient blend.
- Gently fold the dry ingredients into the wet mixture, stirring until just combined to prevent overmixing.
- Use a mini ice cream scoop to portion out the dough, placing each ball approximately 2 inches apart on the prepared baking sheet.
- Optional: Gently roll each dough ball between your palms to create a smoother, more uniform surface.
- Bake for 7-8 minutes, watching carefully to ensure cookies remain soft and do not overcook.
- Allow cookies to rest in the pan for 1-2 minutes, then transfer to a cooling rack to cool completely.
- Prepare the filling by blending cream cheese, powdered sugar, butter, and vanilla until smooth and creamy.
- Transfer the filling to a piping bag, preparing for cookie assembly.
- Once cookies have cooled, pipe a generous amount of filling onto one cookie and sandwich with another.
- Refrigerate the stuffed cookies for 3 hours to set the filling and maintain their shape, storing in the refrigerator.
Notes
- Soften cream cheese at room temperature for smooth, lump-free filling that spreads easily.
- Use full-fat cream cheese for richer, more decadent cookie texture and deeper flavor profile.
- Avoid overmixing dough to prevent tough, dense cookies; mix until ingredients are just combined.
- Chill dough for 30 minutes before baking to prevent excessive spreading and maintain cookie shape.
- Prep Time: 25 minutes
- Cook Time: 8 minutes
- Category: Desserts, Snacks
- Method: Baking
- Cuisine: American
Nutrition
- Serving Size: 24
- Calories: 300
- Sugar: 30 g
- Sodium: 150 mg
- Fat: 15 g
- Saturated Fat: 9 g
- Unsaturated Fat: 4 g
- Trans Fat: 0 g
- Carbohydrates: 40 g
- Fiber: 1 g
- Protein: 3 g
- Cholesterol: 35 mg
Nathaniel Brooks
Founder & Recipe Developer
Expertise
Farm-to-table cuisine, Seasonal recipe development, Culinary storytelling
Education
Ivy Tech Community College – Indianapolis, IN
Culinary Arts / Hospitality Administration & Events
Focused on hands-on training in classical and modern culinary techniques.
Nathaniel’s story starts in the foothills of the Appalachian Mountains, where farm stands, backyard gardens, and old family recipes shaped his love for real food. After graduating from Ivy Tech Community College in Indianapolis, he spent years working in farm-to-table kitchens, learning how to turn local, seasonal ingredients into something memorable.
Today, Nathaniel pours that same spirit into every single recipe on Aspiring Culinarian – recipes that feel real, comforting, and connected to the land. When he’s not in the kitchen, you’ll find him foraging wild herbs, chasing sunsets with his camera, or writing about the flavors that shaped his roots.