Irresistible Red Velvet Whoopie Pies Recipe: Sweet Sandwich Magic
Whipping up a batch of delectable red velvet whoopie pies can transform any ordinary afternoon into a sweet celebration.
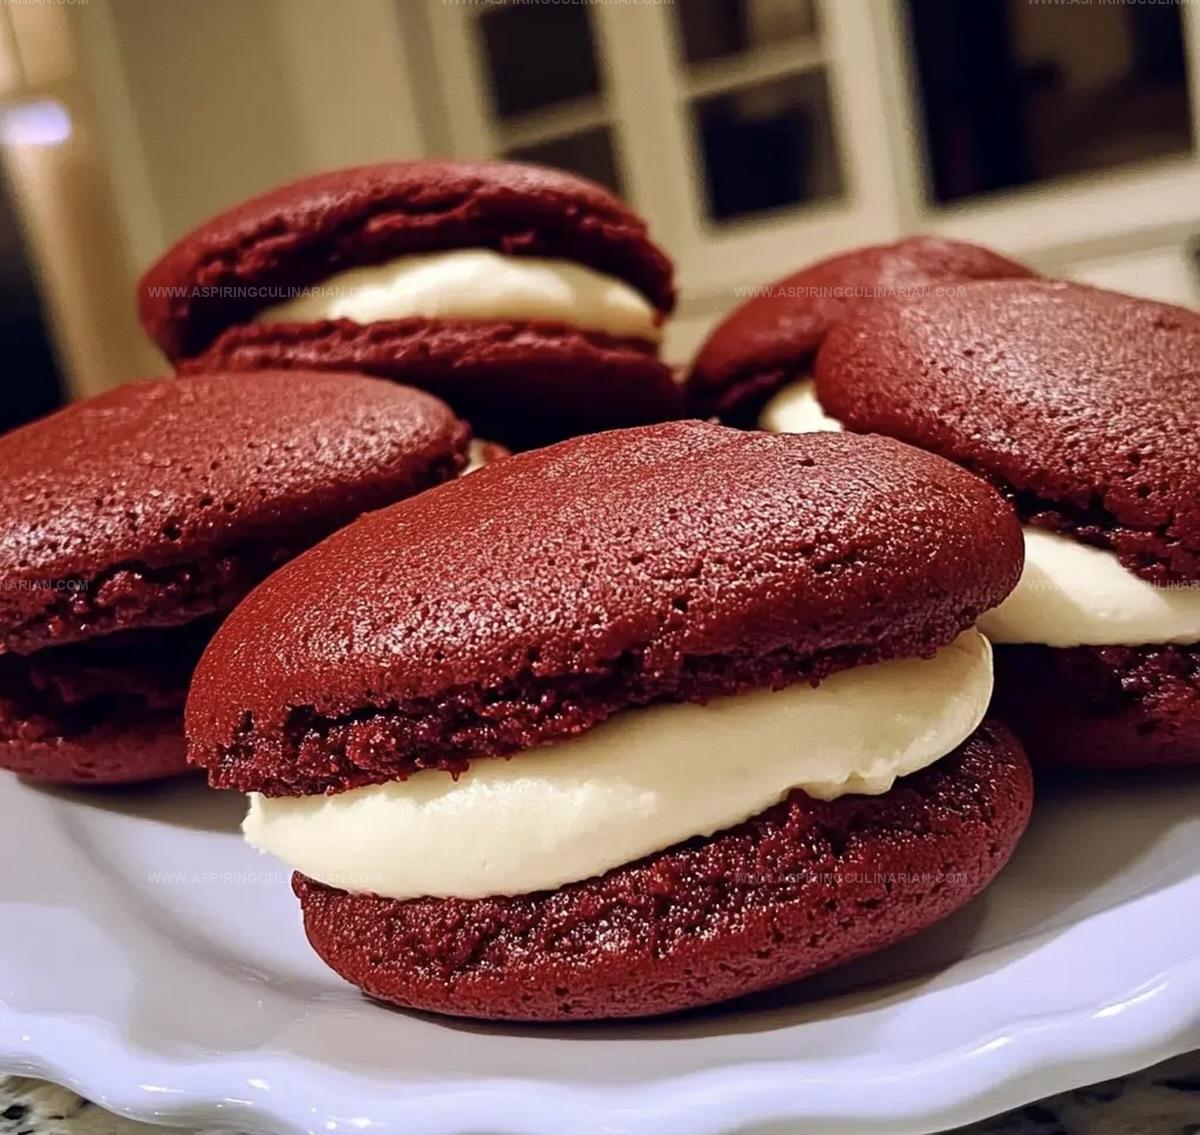
Soft, pillowy clouds of crimson cake sandwich creamy filling between perfectly shaped rounds.
Rich cocoa undertones mingle with subtle vanilla hints, creating an irresistible dessert.
Bakery-style treats like these often seem intimidating, but you’ll discover they’re surprisingly simple to create.
Delicate yet indulgent, these whoopie pies promise to become your new favorite homemade dessert.
Minimal ingredients and straightforward techniques mean you can master this recipe in no time.
Let’s embark on a delicious journey that will delight your taste buds and impress everyone around you.
Red Velvet Whoopie Pies—Sweet Cream Cheese Perfection
Gather These Ingredients for Red Velvet Whoopie Pies
Main Ingredients:Binding and Leavening Agents:Filling Ingredients:Step-by-Step for Soft, Chewy Whoopie Pie Cookies
Step 1: Warm Up The Oven
Prepare your oven by heating it to 350F (175C).
Line two baking sheets with parchment paper for perfect non-stick baking.
Step 2: Mix Dry Ingredients
Grab a mixing bowl and sift together:Ensure the mixture is light and free of lumps.
Step 3: Create Creamy Base
In a separate large bowl, whip the softened butter and granulated sugar until they become fluffy and light.
Add the egg and vanilla extract, blending everything smoothly.
Step 4: Combine Wet And Dry Mixtures
Gradually incorporate the dry ingredients into the butter mixture.
Alternate between adding dry ingredients and buttermilk to create a silky batter.
Stir in red food coloring until the batter looks vibrant and consistent.
Step 5: Shape And Bake Cookies
Scoop spoonfuls of batter onto prepared baking sheets, leaving space between each dollop.
Bake for 10-12 minutes until the edges are set and cookies look puffy.
Step 6: Whip Up Creamy Filling
In a clean bowl, beat together:Mix until the filling becomes smooth and luxuriously creamy.
Step 7: Sandwich The Whoopie Pies
Once cookies have completely cooled, spread the cream cheese filling on the flat side of one cookie.
Gently press another cookie on top to create a delightful sandwich.
Tips for Fluffy Filling and Perfect Red Velvet Cookies
Red Velvet Whoopie Pie Variations to Try
Plating and Serving Whoopie Pies for Dessert
How to Keep Whoopie Pies Fresh for Days
FAQs
The red food coloring is added to create the signature vibrant red hue, while cocoa powder provides a subtle chocolate undertone that’s traditional in red velvet recipes.
Not at all! They’re actually quite simple. The recipe involves basic mixing techniques like creaming butter and sugar, sifting dry ingredients, and assembling the sandwich cookies with cream cheese filling.
Yes, you can prepare the cookies and filling separately in advance. Store the cookies in an airtight container and the filling in the refrigerator, then assemble just before serving to keep them fresh and prevent sogginess.
Print
Red Velvet Whoopie Pies Recipe
- Total Time: 37 minutes
- Yield: 12 1x
Description
Indulgent red velvet whoopie pies merge classic Southern charm with playful dessert magic. Cream cheese frosting nestled between rich cocoa cakes creates irresistible handheld treats that will delight you with each delectable bite.
Ingredients
Main Ingredients:
- 2 cups all-purpose flour
- 1/2 cup unsalted butter, softened
- 1 cup granulated sugar
- 1/2 cup buttermilk
- 1 large egg
Dry Ingredients:
- 2 tablespoons cocoa powder
- 1/2 teaspoon baking soda
- 1/4 teaspoon salt
- 1 tablespoon red food coloring
Filling Ingredients:
- 1/2 cup unsalted butter, softened
- 8 ounces cream cheese, softened
- 3 cups powdered sugar
- 1 teaspoon vanilla extract
- 1 teaspoon vanilla extract
Instructions
- Preheat the oven to 350°F (175°C) and arrange parchment paper on two baking sheets to ensure even cooking and prevent sticking.
- Sift flour, cocoa powder, baking soda, and salt together in a mixing bowl, creating a uniform dry mixture that will ensure smooth texture.
- In a separate large bowl, cream butter and sugar until the mixture becomes light, airy, and pale, incorporating air for a fluffy consistency.
- Blend the egg and vanilla extract into the butter mixture, mixing thoroughly to create a cohesive base for the whoopie pies.
- Gradually incorporate the dry ingredients into the wet mixture, alternating with buttermilk to maintain a smooth batter consistency.
- Add red food coloring and mix until the batter achieves a vibrant, uniform red color throughout.
- Using a spoon, drop uniform rounds of batter onto prepared baking sheets, spacing them to allow for slight spreading during baking.
- Bake for 10-12 minutes, or until the edges are set and the centers spring back when lightly touched, indicating perfect doneness.
- Allow the whoopie pie cookies to cool completely on a wire rack, ensuring they reach room temperature before filling.
- Prepare the cream cheese filling by beating butter, cream cheese, powdered sugar, and vanilla extract until smooth and creamy.
- Once cooled, match cookie halves of similar size and spread a generous layer of cream cheese filling on the flat side of one cookie.
- Gently press a matching cookie half on top of the filling, creating a delightful sandwich with smooth, even coverage.
Notes
- Choose high-quality cocoa powder for richer, deeper flavor and enhance the red velvet’s distinctive taste.
- Ensure butter and eggs are at room temperature to create smoother, more evenly mixed batter that incorporates ingredients perfectly.
- Use gel food coloring instead of liquid for more vibrant red color without altering the batter’s consistency.
- For gluten-free version, substitute all-purpose flour with a 1:1 gluten-free baking blend to maintain soft, cake-like texture of whoopie pies.
- Prep Time: 25 minutes
- Cook Time: 12 minutes
- Category: Desserts, Snacks
- Method: Baking
- Cuisine: American
Nutrition
- Serving Size: 12
- Calories: 310 kcal
- Sugar: 32 g
- Sodium: 140 mg
- Fat: 16 g
- Saturated Fat: 9 g
- Unsaturated Fat: 6 g
- Trans Fat: 0.5 g
- Carbohydrates: 40 g
- Fiber: 1 g
- Protein: 3 g
- Cholesterol: 40 mg
Nathaniel Brooks
Founder & Recipe Developer
Expertise
Farm-to-table cuisine, Seasonal recipe development, Culinary storytelling
Education
Ivy Tech Community College – Indianapolis, IN
Culinary Arts / Hospitality Administration & Events
Focused on hands-on training in classical and modern culinary techniques.
Nathaniel’s story starts in the foothills of the Appalachian Mountains, where farm stands, backyard gardens, and old family recipes shaped his love for real food. After graduating from Ivy Tech Community College in Indianapolis, he spent years working in farm-to-table kitchens, learning how to turn local, seasonal ingredients into something memorable.
Today, Nathaniel pours that same spirit into every single recipe on Aspiring Culinarian – recipes that feel real, comforting, and connected to the land. When he’s not in the kitchen, you’ll find him foraging wild herbs, chasing sunsets with his camera, or writing about the flavors that shaped his roots.