Reeses Peanut Butter Cup Cookies Recipe
My sweet-toothed adventure with Reese’s peanut butter cup cookies began during a lazy weekend baking experiment.
Chocolate and peanut butter create an irresistible combination that melts hearts instantly.
Friends always request this nostalgic treat whenever we gather.
Soft, chewy cookies studded with chopped candy pieces promise pure indulgence.
Decadent chocolate chips complement the classic peanut butter flavor perfectly.
Simple ingredients and straightforward steps make this recipe accessible for bakers of all skill levels.
You’ll be amazed how quickly these cookies disappear from the plate.
Dive in and let deliciousness guide your baking journey.
FAQs
Yes, you can! Crunchy peanut butter will add extra texture to your cookies and still taste delicious.
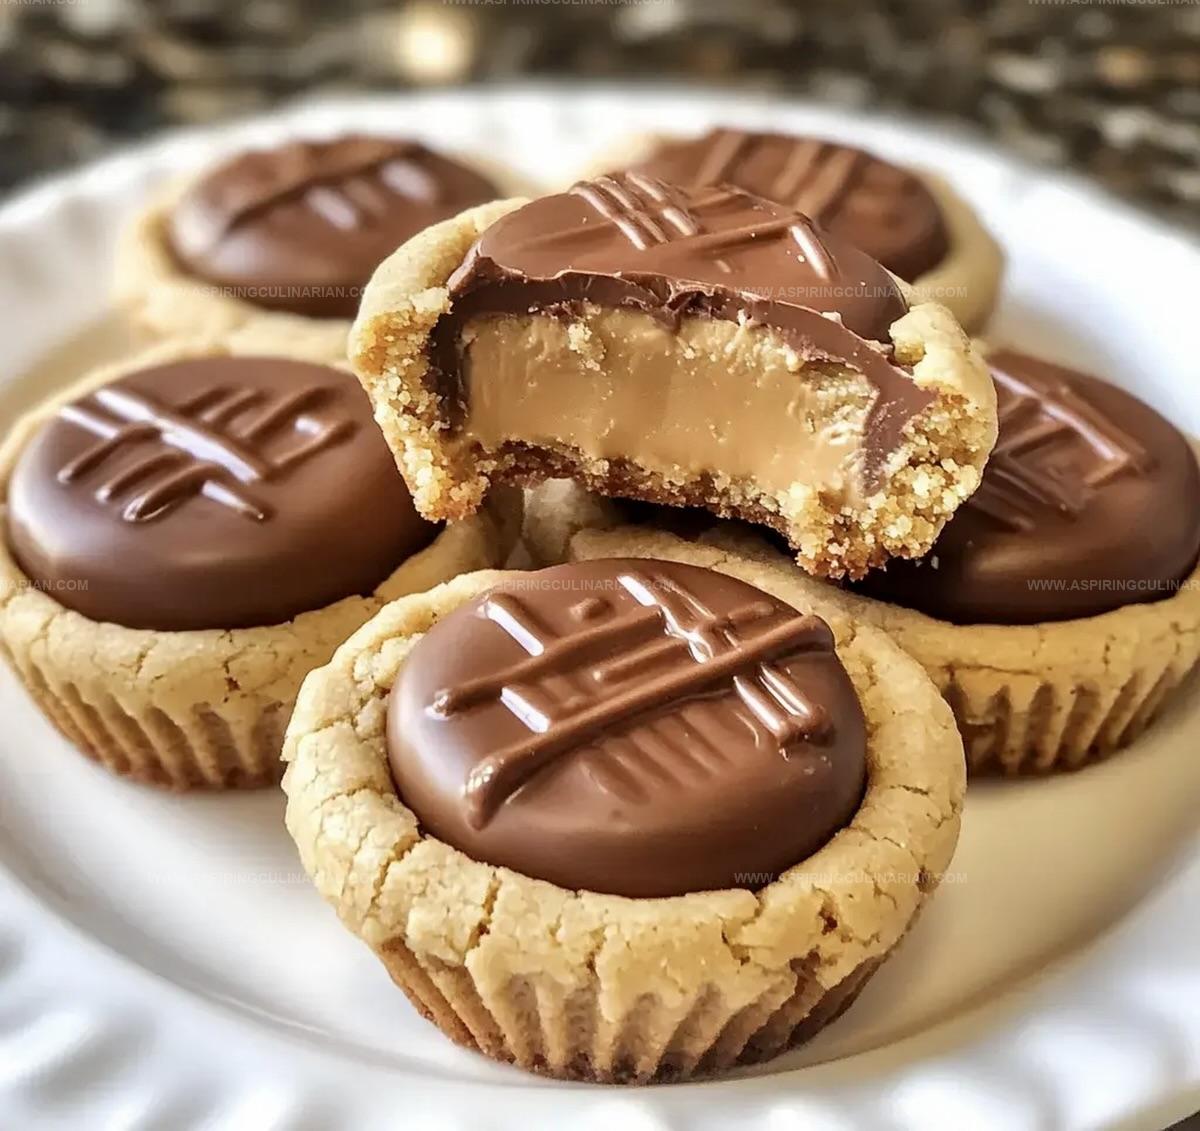
Press the Reese’s cups gently into the warm cookies right after baking, but not too deep. The residual heat will slightly melt the chocolate without completely destroying the shape.
You can use a regular baking sheet and make traditional drop cookies. Just flatten the dough slightly and place Reese’s cups on top after baking.
Reese’s Peanut Butter Cup Cookies – Irresistibly Chocolatey
Ingredients to Create Reese’s Peanut Butter Cup Cookies
Base Ingredients:Binding Ingredients:Dry Ingredients:How to Bake Peanut Butter Cup Cookies at Home
Step 1: Warm Up the Oven
Fire up your oven to a toasty 350F (177C).
This will create the perfect baking environment for your delicious treats.
Step 2: Whip Up the Base
In a large mixing bowl, blend these ingredients until super smooth:Use a mixer or whisk to create a rich, velvety mixture that will make your cookies irresistible.
Step 3: Bring It All Together
Introduce these additions to your creamy base:Mix thoroughly until everything is perfectly combined.
Then gently fold in:Stir just until the ingredients are married together – don’t overmix!
Step 4: Shape Your Cookies
Roll the dough into cute little balls.
Nestle each ball into a greased mini muffin pan, giving them just enough space to become magical.
Step 5: Bake to Perfection
Slide the pan into the preheated oven and bake for 8-10 minutes.
Watch for those golden edges that signal deliciousness is about to happen.
Step 6: Crown Your Cookies
Pull the pan from the oven.
Quickly press a mini Reeses cup right into the center of each warm cookie.
The chocolate will start to melt slightly, creating a heavenly moment.
Step 7: Let Them Rest
Allow your cookies to chill in the pan for a few minutes.
Then transfer them to a cooling rack to set completely.
Resist the temptation to devour immediately – though it will be hard!
Tips for Melty, Perfect Peanut Butter Cup Cookies
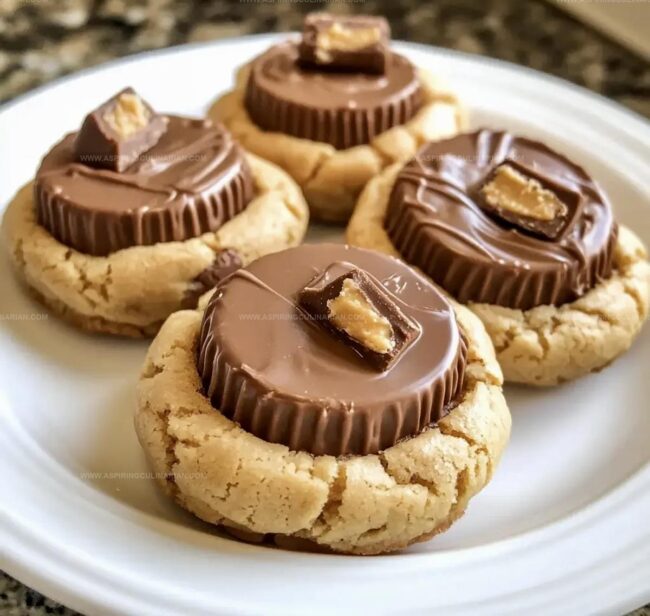
Cookie Variations with Extra Reese’s Flavors
Serving Reese’s Cookies for Dessert Buffets
Keeping Peanut Butter Cup Cookies Soft and Chewy
Print
Reeses Peanut Butter Cup Cookies Recipe
- Total Time: 25 minutes
- Yield: 24 1x
Description
Irresistible Reese’s peanut butter cup cookies combine classic chocolate chip magic with beloved candy pieces. Rich peanut butter notes and chocolate chunks create sweet perfection for cookie enthusiasts seeking pure indulgence.
Ingredients
Main Ingredients:
- 1 (11 ounces) bag mini Reeses peanut butter cups
- 1 1/2 cups flour
- 1 egg
Fats and Sugars:
- 1/2 cup butter, softened
- 1/2 cup creamy peanut butter
- 1/2 cup sugar
- 1/2 cup brown sugar
Seasonings and Leavening:
- 1/2 teaspoon vanilla extract
- 3/4 teaspoon baking powder
- 1/2 teaspoon salt
Instructions
- Preheat oven to 350°F (177°C) and prepare a mini muffin pan with non-stick spray.
- In a large mixing bowl, blend softened butter, peanut butter, white sugar, and brown sugar until achieving a smooth, creamy consistency.
- Incorporate vanilla extract and egg into the mixture, stirring until thoroughly combined and uniform in texture.
- Gradually fold in flour, baking powder, and salt, mixing gently until ingredients are just integrated without overmixing.
- Shape dough into small, uniform balls approximately the size of a walnut, placing each carefully into the prepared muffin pan cavities.
- Bake for 8-10 minutes, watching for slight golden edges indicating perfect doneness.
- Immediately after removing from the oven, gently press a mini Reese’s peanut butter cup into the center of each warm cookie, allowing the chocolate to slightly melt.
- Let cookies rest in the pan for 3-4 minutes to stabilize their structure, then carefully transfer to a wire cooling rack to complete cooling and set completely.
Notes
- Chill the dough briefly before rolling to prevent sticky hands and ensure uniform cookie shapes.
- Use room temperature ingredients for smoother mixing and better cookie texture.
- Swap traditional peanut butter with sunflower seed butter for nut-free allergic-friendly version.
- Slightly underbake cookies to maintain soft, gooey centers that melt in your mouth.
- Prep Time: 15 minutes
- Cook Time: 10 minutes
- Category: Desserts, Snacks
- Method: Baking
- Cuisine: American
Nutrition
- Serving Size: 24
- Calories: 172
- Sugar: 13 g
- Sodium: 98 mg
- Fat: 10 g
- Saturated Fat: 3 g
- Unsaturated Fat: 6 g
- Trans Fat: 0 g
- Carbohydrates: 18 g
- Fiber: 1 g
- Protein: 3 g
- Cholesterol: 22 mg
Nathaniel Brooks
Founder & Recipe Developer
Expertise
Farm-to-table cuisine, Seasonal recipe development, Culinary storytelling
Education
Ivy Tech Community College – Indianapolis, IN
Culinary Arts / Hospitality Administration & Events
Focused on hands-on training in classical and modern culinary techniques.
Nathaniel’s story starts in the foothills of the Appalachian Mountains, where farm stands, backyard gardens, and old family recipes shaped his love for real food. After graduating from Ivy Tech Community College in Indianapolis, he spent years working in farm-to-table kitchens, learning how to turn local, seasonal ingredients into something memorable.
Today, Nathaniel pours that same spirit into every single recipe on Aspiring Culinarian – recipes that feel real, comforting, and connected to the land. When he’s not in the kitchen, you’ll find him foraging wild herbs, chasing sunsets with his camera, or writing about the flavors that shaped his roots.