The Ultimate Smash Burger Grilled Cheese Recipe for Comfort Food Fans
Crafting a mouthwatering smash burger grilled cheese demands serious culinary creativity that breaks traditional sandwich boundaries.
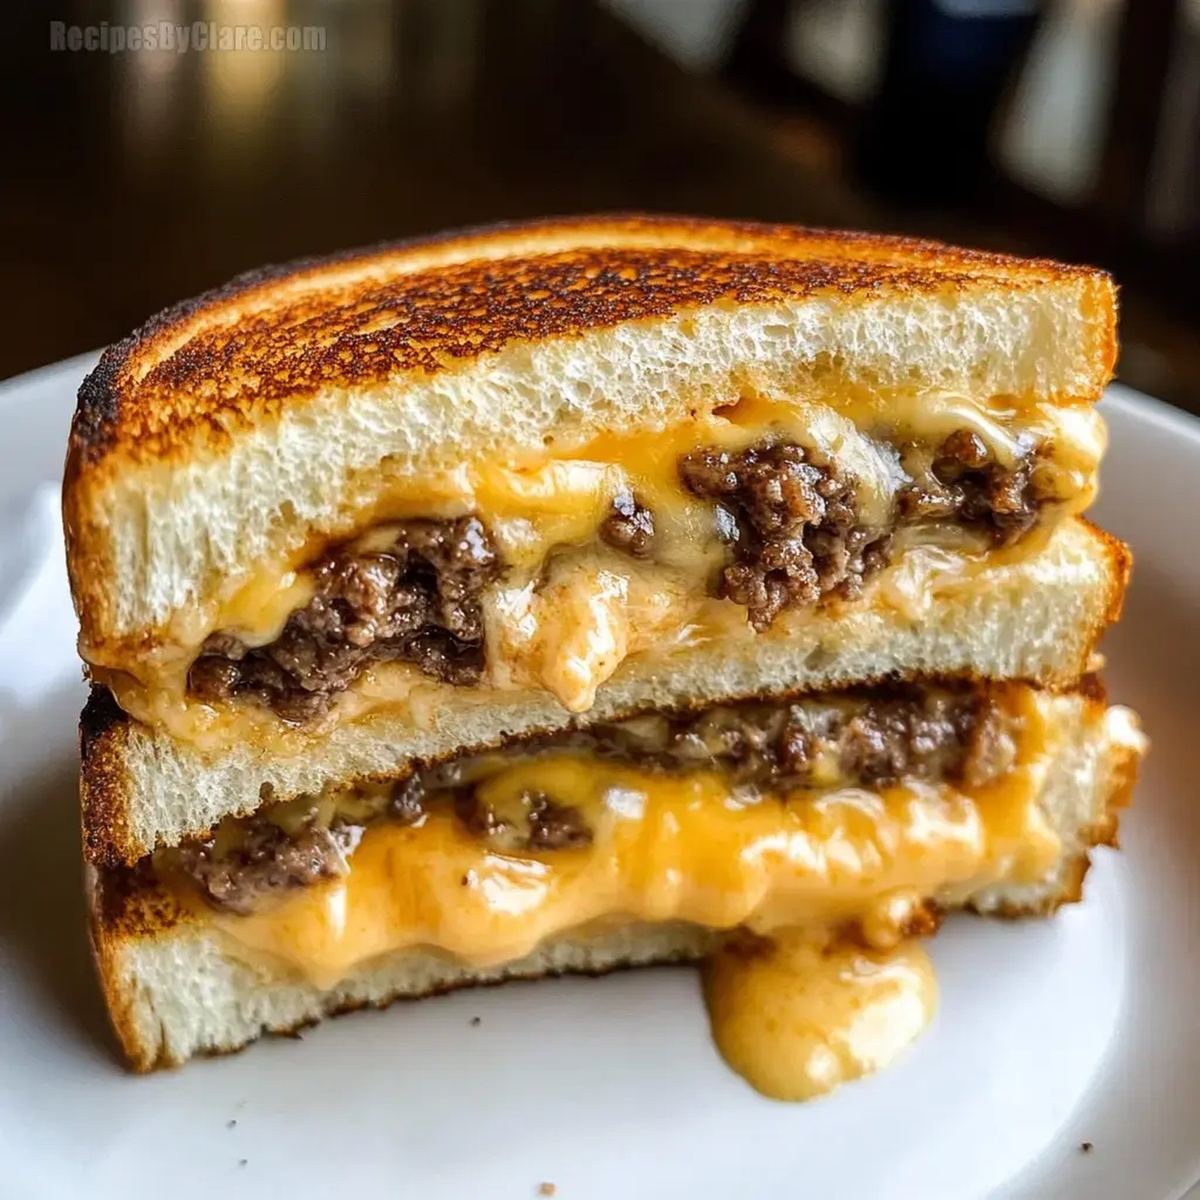
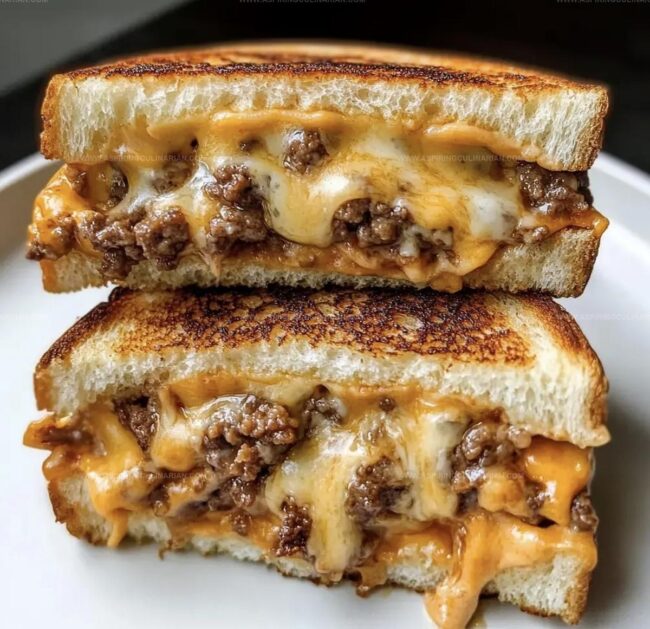
Melty cheese and crispy beef edges create an irresistible combination for hungry taste buds.
Professional chefs and home cooks alike can master this delectable fusion with simple techniques.
Kitchen enthusiasts seek bold flavor experiences that challenge conventional meal expectations.
Perfectly caramelized meat and gooey cheese layers promise a sensational bite in every mouthful.
Rich textures and robust seasonings elevate this comfort food classic into a gourmet sensation.
You’ll want to gather ingredients and start cooking right now.
Proper Storage of Grilled Cheese Sandwich Leftovers
FAQs
Cast iron provides the highest heat retention and creates the perfect crispy, caramelized crust on the burger patties, which is essential for achieving that authentic smash burger texture.
While American and Havarti work best for melting and flavor, you can experiment with cheddar or Swiss cheese. Just ensure the cheese melts well and complements the beef’s rich flavor.
Aim for extremely thin patties, about 1/4 inch thick. The thinner the patty, the more crispy edges you’ll create, which is the signature characteristic of a smash burger.
Smash Burger Grilled Cheese: The Best of Both Worlds
Smash Burger Grilled Cheese Ingredient Essentials
Meat Base:Cheese Components:Sandwich Foundations:Flavor Enhancers:Vegetable Additions:Cooking Agents:Stepwise Guide for Smash Burger Grilled Cheese
Step 1: Prepare Beef Balls
Shape ground beef into four equal-sized round balls.
Fire up a cast iron skillet or griddle until it’s blazing hot with intense heat.
This high temperature will create those delicious crispy edges.
Step 2: Smash And Season Patties
Drop beef balls onto the scorching skillet.
Sprinkle with salt and pepper.
Add these ingredients for maximum flavor:Place thinly sliced onions on top of each ball.
Using parchment paper and a sturdy spatula, press down firmly to transform balls into ultra-thin, crispy patties.
Step 3: Create Crispy Cheese Patties
Cook patties until edges turn deep golden and caramelized.
Carefully flip each patty and immediately crown with American cheese slices.
Continue cooking until cheese melts completely and meat reaches safe internal temperature of 165°F.
Step 4: Build Sandwich Foundations
Generously spread smashburger sauce across bread slices.
Layer each sandwich with:Top with remaining bread slice to complete the sandwich structure.
Step 5: Grill To Golden Perfection
Melt butter in skillet over medium heat.
Carefully place sandwiches and grill until achieving beautiful golden-brown exterior.
Flip once to ensure even browning and complete cheese melting.
Step 6: Serve And Enjoy
Allow sandwiches to rest momentarily before slicing.
Serve with extra smashburger sauce for delightful dipping experience.
Watch everyone’s eyes light up with first bite!
Kitchen Tricks for Crispy Grilled Cheese Burgers
Creative Fillings for Smash Burger Grilled Cheese Fans
Smash Burger Grilled Cheese Presentation Inspiration
Print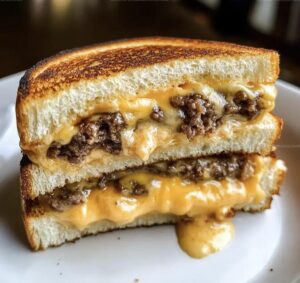
Smash Burger Grilled Cheese Recipe
- Total Time: 25 minutes
- Yield: 4 1x
Description
Culinary magic meets comfort with this Smash Burger Grilled Cheese, blending crispy beef patties and melted cheese between golden-brown bread slices. Crisp edges, rich flavors, and irresistible textures promise a mouthwatering experience you’ll crave again and again.
Ingredients
Meat:
- 1 pound (1 lb) ground beef
Cheese:
- 8 slices American cheese
- 2 cups Havarti cheese, shredded
Additional Ingredients:
- 1 small onion, thinly sliced
- 8 slices hearty white bread
- 1/3 cup sliced dill pickle chips
- 1/2 cup smashburger sauce
- 2 tablespoons (2 tbsp) salted butter
- Kosher salt (to taste)
- Freshly cracked pepper (to taste)
Instructions
- Prepare ground beef into 4 uniform spheres while heating a cast iron skillet until extremely hot, approximately 450-500°F.
- Position beef balls onto the scorching skillet, immediately seasoning with salt, pepper, and smashburger sauce. Strategically place sliced onions atop each ball.
- Using parchment paper and a sturdy spatula, forcefully compress beef balls into ultra-thin, crispy-edged patties. Allow caramelization to develop, creating signature golden-brown surfaces.
- Carefully flip patties and immediately crown each with American cheese slices. Continue cooking until cheese melts completely and meat reaches 165°F internal temperature.
- Spread smashburger sauce across bread slices, creating a flavor foundation for the sandwich construction.
- Layer each bread slice with a cheese-covered patty, sprinkle pickle chips strategically, and generously distribute shredded Havarti cheese.
- Complete sandwich assembly by adding a complementary bread slice on top, creating a robust flavor profile.
- Melt butter in a separate skillet over medium heat, around 325°F, preparing for grilling.
- Carefully transfer sandwiches into the buttered skillet, grilling until achieving a golden-brown exterior and ensuring complete cheese melting.
- Rotate sandwiches once midway through cooking to guarantee uniform browning and optimal texture.
- Remove from heat, allowing sandwiches to rest briefly for 60 seconds, enabling cheese to stabilize.
- Slice diagonally and serve immediately, accompanied by additional smashburger sauce for enhanced dipping experience.
Notes
- Choose high-fat ground beef with 80/20 ratio for juicier, more flavorful patties that caramelize beautifully.
- Avoid overworking meat when forming balls to prevent tough, dense texture and maintain tender, loose consistency.
- Press patties extremely thin using parchment paper for maximum crispy edges and delicious caramelized surface.
- Preheat skillet until smoking hot to achieve signature smash burger crust and lock in meat’s natural juices.
- Try cheese varieties like sharp cheddar or pepper jack for different flavor profiles while maintaining melty texture.
- Add crispy bacon or caramelized mushrooms as optional mix-ins to elevate sandwich complexity and richness.
- For gluten-free version, swap bread with lettuce wraps or gluten-free bread and ensure sauce ingredients are certified gluten-free.
- Prep Time: 10 minutes
- Cook Time: 15 minutes
- Category: Lunch, Dinner, Snacks
- Method: Grilling
- Cuisine: American
Nutrition
- Serving Size: 4
- Calories: 750 kcal
- Sugar: 6 g
- Sodium: 900 mg
- Fat: 55 g
- Saturated Fat: 25 g
- Unsaturated Fat: 27 g
- Trans Fat: 1.5 g
- Carbohydrates: 40 g
- Fiber: 2 g
- Protein: 45 g
- Cholesterol: 130 mg
Nathaniel Brooks
Founder & Recipe Developer
Expertise
Farm-to-table cuisine, Seasonal recipe development, Culinary storytelling
Education
Ivy Tech Community College – Indianapolis, IN
Culinary Arts / Hospitality Administration & Events
Focused on hands-on training in classical and modern culinary techniques.
Nathaniel’s story starts in the foothills of the Appalachian Mountains, where farm stands, backyard gardens, and old family recipes shaped his love for real food. After graduating from Ivy Tech Community College in Indianapolis, he spent years working in farm-to-table kitchens, learning how to turn local, seasonal ingredients into something memorable.
Today, Nathaniel pours that same spirit into every single recipe on Aspiring Culinarian – recipes that feel real, comforting, and connected to the land. When he’s not in the kitchen, you’ll find him foraging wild herbs, chasing sunsets with his camera, or writing about the flavors that shaped his roots.