Dreamy Strawberry Cheesecake Cookie Cups Recipe for Sweet Lovers
Sweet, creamy cheesecake meets classic cookie in this irresistible strawberry cheesecake cookie cups recipe that promises pure dessert magic.
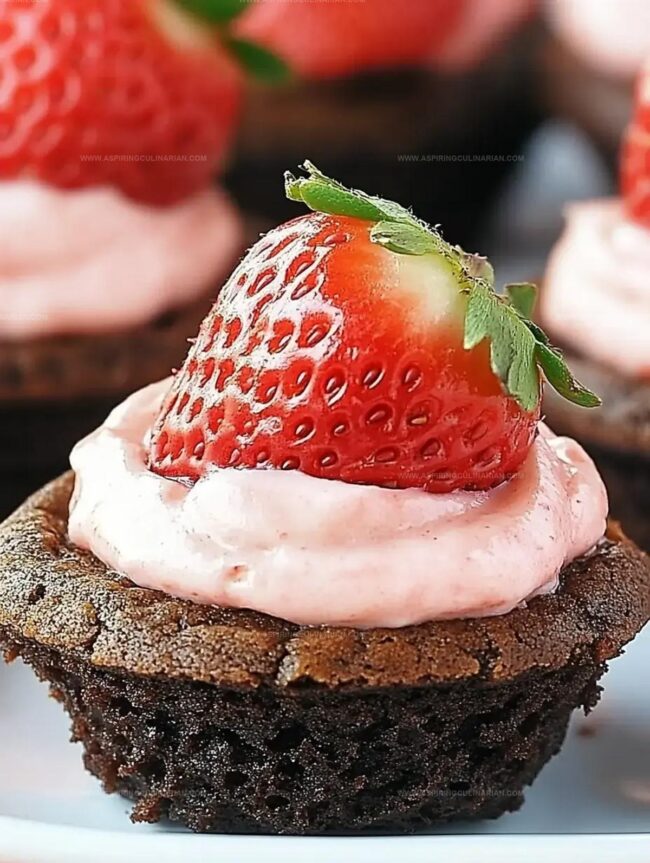
Soft, buttery cookie shells cradle a luscious cream cheese filling that melts in your mouth.
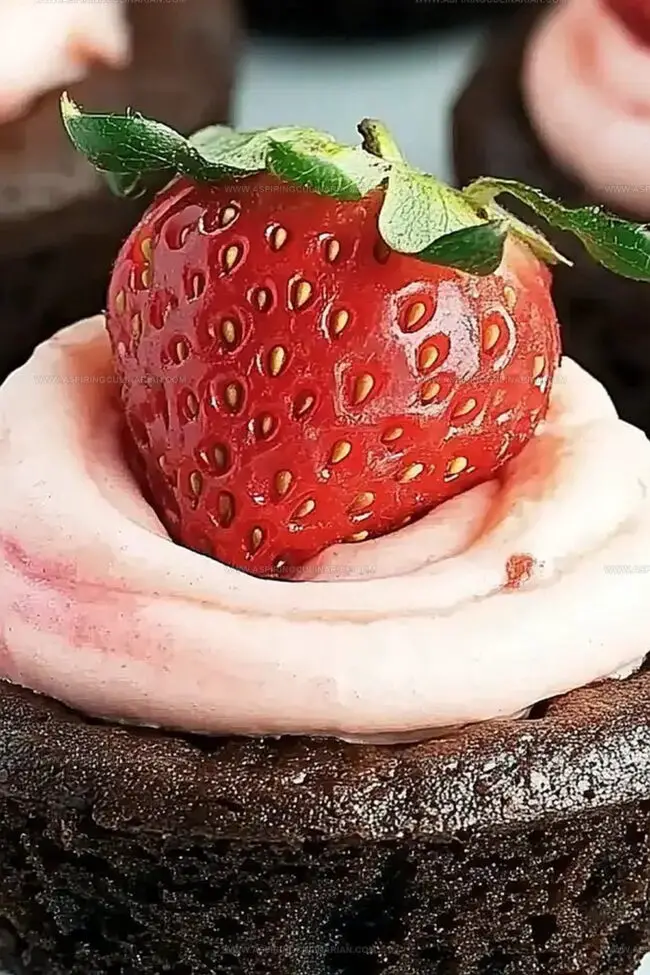
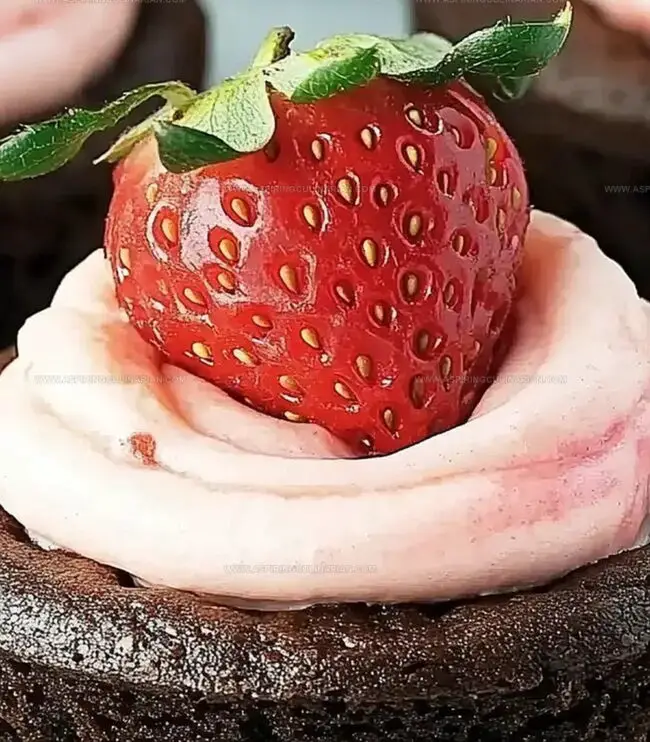
Fresh strawberries add a vibrant burst of fruity flavor to each delightful bite.
These mini desserts blend textures and tastes in a way that’ll make everyone at the table smile.
Each cup is a perfect balance of crisp cookie and smooth, rich filling.
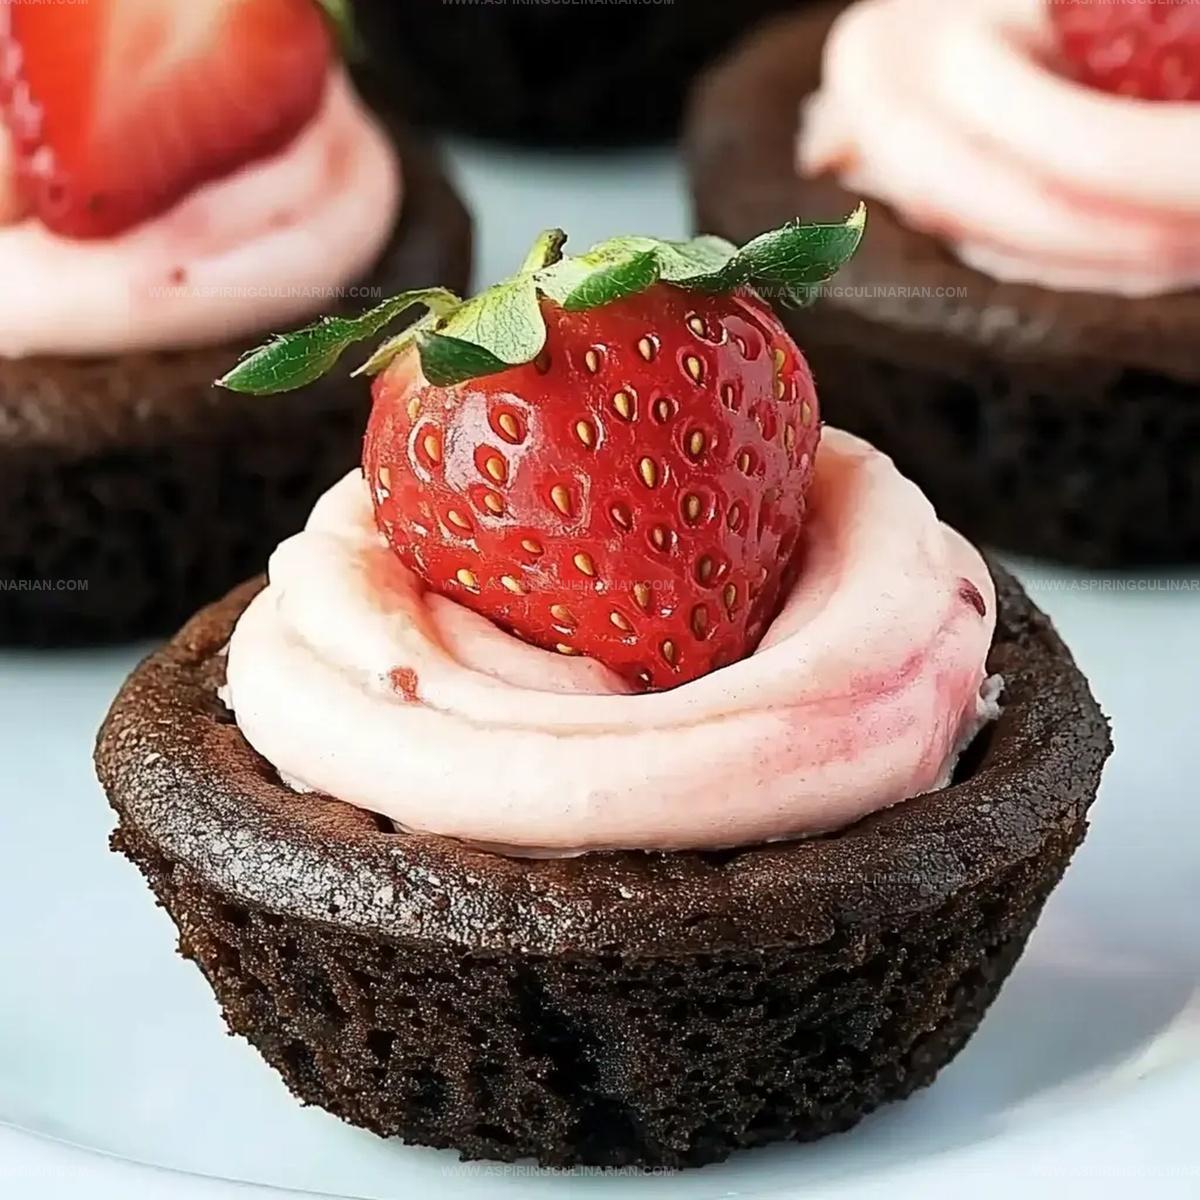
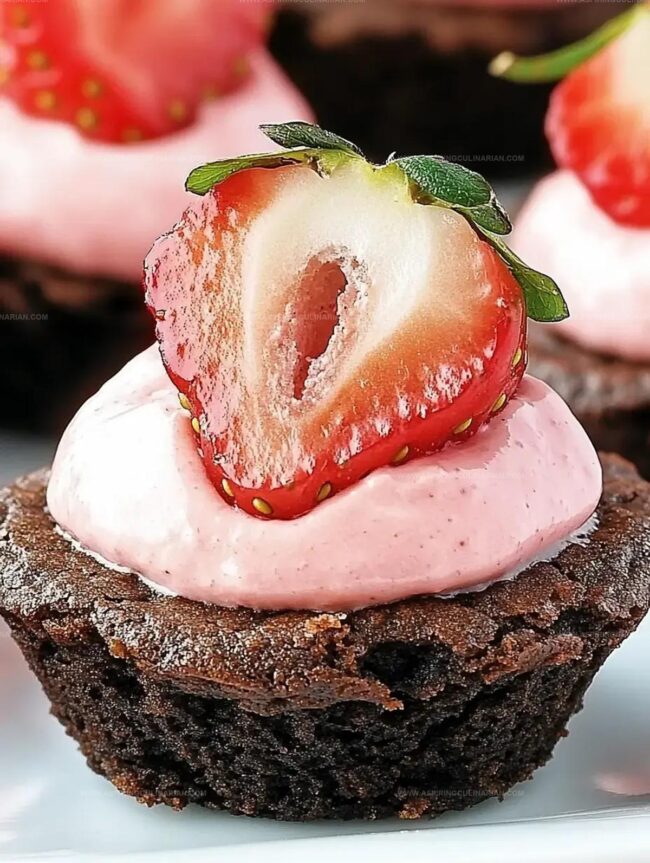
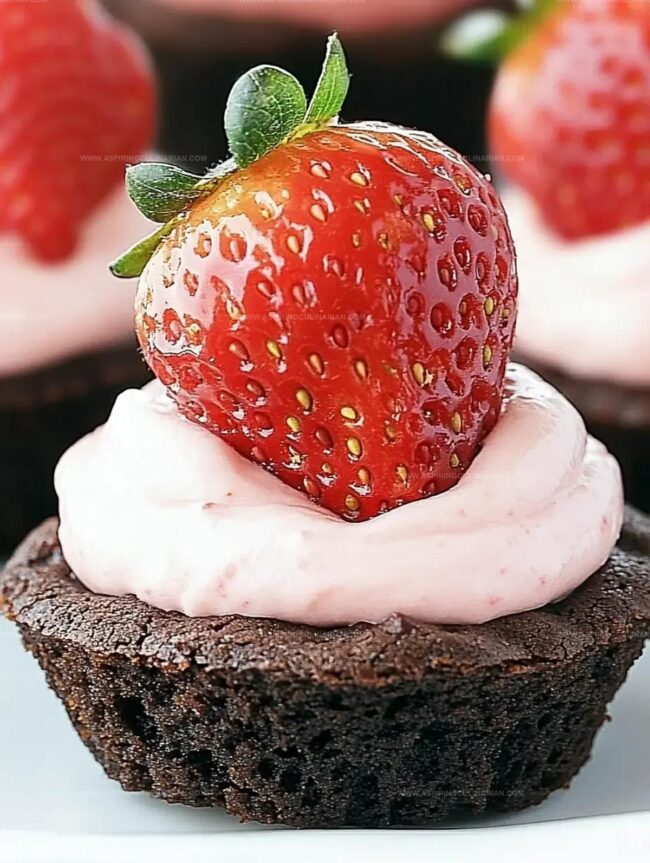
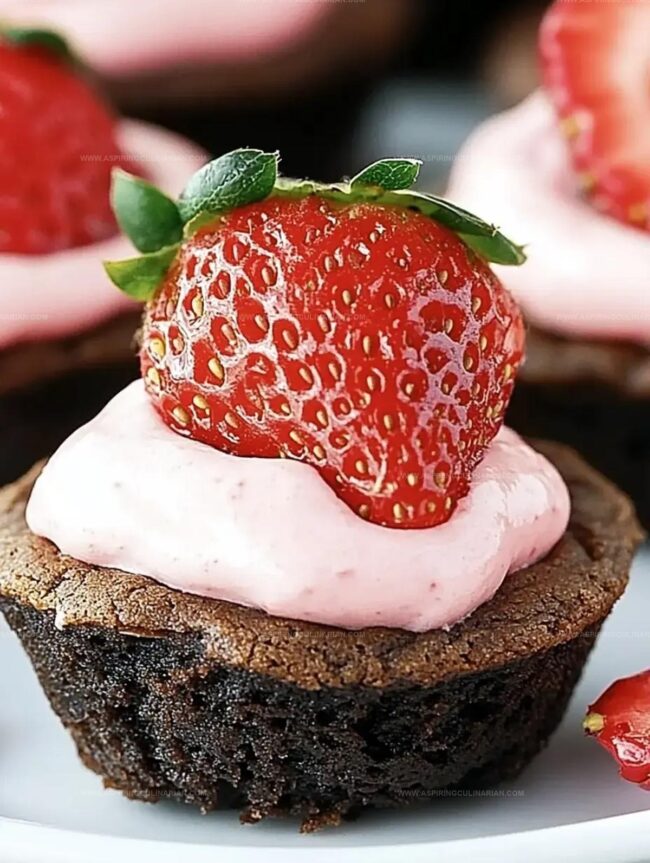
The combination of tangy cream cheese and sweet strawberries creates an elegant yet playful treat.
Prepare to wow your taste buds with this simple yet stunning dessert that’s sure to become a new favorite.
Strawberry Cheesecake Cookie Cups Delicious Appeal
Ingredients in Strawberry Cheesecake Cookie Cups
Dry Ingredients:Wet Ingredients:Filling and Topping Ingredients:Making Strawberry Cheesecake Cookie Cups
Step 1: Warm Up the Oven
Crank your oven to a toasty 350°F.
Grab your cupcake pan and give it a quick spray with cooking spray to prevent sticking.
In a mixing bowl, combine your dry ingredients:Whisk these together until well blended.
Step 2: Create the Cookie Base
Using an electric mixer, cream together butter and sugar until the mixture looks light and fluffy.
This should take about 2-3 minutes.
Crack in an egg and splash of vanilla extract.
Mix until everything is beautifully incorporated.
Gradually fold in your dry ingredient mixture until a soft dough forms.
Step 3: Shape the Cookie Cups
Roll out small dough balls, about two tablespoons each.
Gently press these into your cupcake pan, creating little cup shapes that climb up the sides.
Make sure to form an even layer that will hold your delicious filling.
Step 4: Bake to Perfection
Slide the pan into the preheated oven.
Bake for 10-12 minutes until the edges look golden and set.
Once done, let them cool in the pan for about 5 minutes.
If the centers have puffed up, softly press them down.
Transfer the cookie cups to a cooling rack.
Step 5: Whip Up the Strawberry Filling
In a clean bowl, beat cream cheese with powdered sugar until smooth.
Slowly incorporate strawberry puree, mixing until you have a creamy, dreamy filling with a beautiful pink hue.
Step 6: Assemble and Chill
Using a piping bag or spoon, fill each cooled cookie cup with the strawberry cream cheese mixture.
Top with fresh, sliced strawberries for a burst of color and flavor.
Refrigerate until you’re ready to serve these delightful treats.
Tips for Cookie Cup Perfection
Creative Cookie Cup Variations
Serving Strawberry Cheesecake Cookie Cups
Storage Tips for Cookie Cups
FAQs
Yes, thaw and drain frozen strawberries completely before pureeing to prevent excess moisture in the filling.
Let cookies cool in pan for 5 minutes, then gently use a spoon to help lift them out without cracking.
You can prepare cookie cups and filling separately up to 2 days in advance, then assemble just before serving for best texture.
Chill the dough for 15-20 minutes in the refrigerator to make it easier to shape and prevent spreading during baking.
Print
Strawberry Cheesecake Cookie Cups Recipe
- Total Time: 42 minutes
- Yield: 12 1x
Description
Irresistible Strawberry Cheesecake Cookie Cups blend creamy cheesecake filling with buttery cookie bases for a delightful dessert experience. Sweet strawberry chunks and silky cream cheese create a perfect harmony that invites you to savor each delectable bite.
Ingredients
Main Ingredients:
- 1 large egg
- 3/4 cup unsalted butter, room temperature
- 12 ounces (340 grams) cream cheese, room temperature
- 1 cup granulated sugar
- 1 1/4 cups all-purpose flour
- 1/2 cup unsweetened cocoa powder
Dry Ingredients:
- 1 teaspoon baking soda
- 2 teaspoons cornstarch
- 1/2 teaspoon salt
- 2 1/4 cups powdered sugar
Flavoring and Garnish:
- 1 teaspoon vanilla extract
- 5 tablespoons strawberry puree
- Fresh strawberries for garnish
Instructions
- Preheat the oven to 350°F and thoroughly coat a cupcake pan with non-stick spray.
- Sift together the dry ingredients, combining flour, cocoa powder, baking soda, cornstarch, and salt in a medium bowl.
- Using an electric mixer, cream butter and sugar until light and airy, approximately 2-3 minutes.
- Incorporate egg and vanilla extract into the butter mixture, blending until smooth and uniform.
- Gradually fold dry ingredients into the wet mixture, stirring until a cohesive dough forms.
- Portion dough into 2-tablespoon rounds, then carefully press each into the cupcake pan, creating cup-like shapes along the sides.
- Bake for 10-12 minutes until edges are slightly firm and golden.
- Allow cookies to rest in the pan for 5 minutes, gently pressing centers if they’ve puffed up.
- Transfer cookie cups to a wire rack and let cool completely.
- Whip cream cheese and powdered sugar until creamy and well-integrated.
- Slowly stream in strawberry puree, mixing until filling reaches a smooth, consistent texture.
- Pipe the strawberry cream cheese filling into each cooled cookie cup.
- Garnish with fresh strawberry pieces and chill in the refrigerator until ready to serve.
Notes
- Versatile Dough Swap cocoa powder with regular flour for a classic sugar cookie base that accommodates different flavor preferences.
- Texture Tip Press cookie dough gently into pan edges to create uniform, thin walls for delicate and crisp cookie cups.
- Make-Ahead Magic Prepare cookie cups and filling separately, storing them in airtight containers to assemble closer to serving time for maximum freshness.
- Dietary Modifications Replace regular flour with gluten-free blend and use dairy-free cream cheese for allergen-friendly version that maintains delicious flavor profile.
- Prep Time: 30 minutes
- Cook Time: 12 minutes
- Category: Desserts, Snacks
- Method: Baking
- Cuisine: American
Nutrition
- Serving Size: 12
- Calories: 295
- Sugar: 22 g
- Sodium: 160 mg
- Fat: 15 g
- Saturated Fat: 9 g
- Unsaturated Fat: 5 g
- Trans Fat: 0 g
- Carbohydrates: 37 g
- Fiber: 1 g
- Protein: 3 g
- Cholesterol: 33 mg
Lena Martinez
Contributing Writer & Culinary Educator
Expertise
Southwestern and Latin American cuisines, Vegetarian and plant-based recipe development, Culinary education and community outreach
Education
Santa Fe Community College, Santa Fe, NM
Certificate in Culinary Arts
Emphasized Southwestern cuisine and sustainable cooking practices
Lena grew up surrounded by the colors, spices, and traditions of the Southwest – flavors that sparked her love for bold, honest cooking. After earning her Culinary Arts certificate at Santa Fe Community College, she made it her mission to teach home cooks how to create flavorful, plant-powered meals without the fuss.
Her recipes are packed with vibrant ingredients, simple steps, and the kind of heart that turns a regular meal into something you’ll want to share. Outside the kitchen, Lena spends her time wandering farmers’ markets, trading family recipes, and helping young chefs find their voice through food.