The Dreamy Strawberry Dump Cake Recipe Everyone Loves
Sweet summer berries burst with flavor in this mouthwatering strawberry dump cake recipe that promises delightful simplicity.
Dessert lovers adore how effortlessly this treat comes together with minimal preparation.
No complicated mixing or fancy techniques stand between you and a delectable dessert.
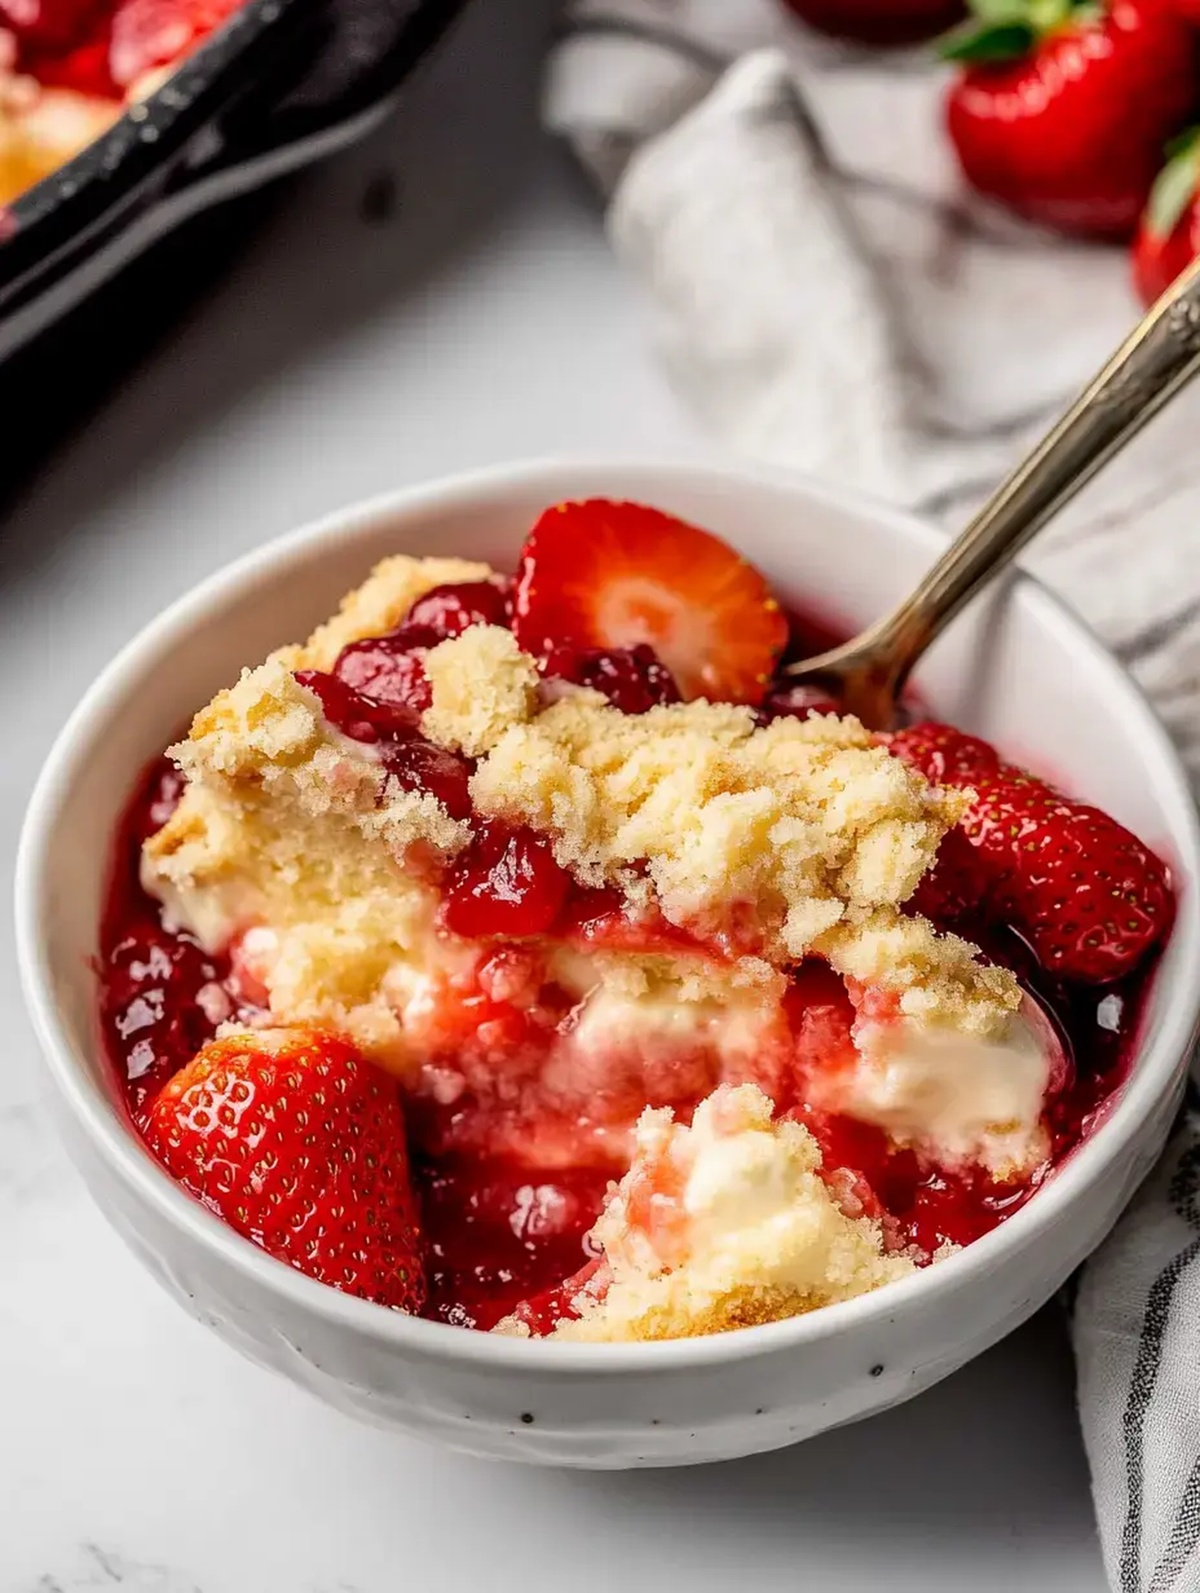
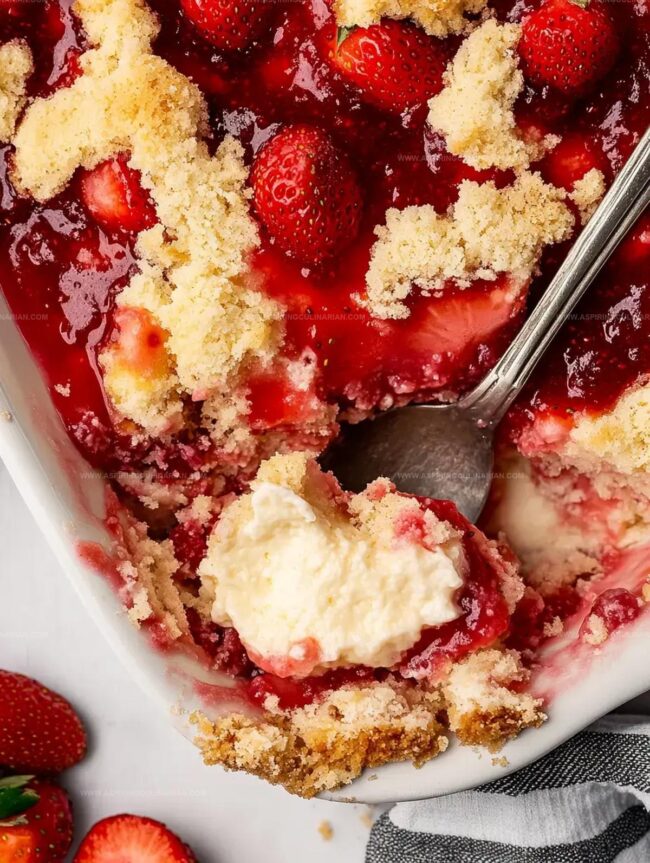
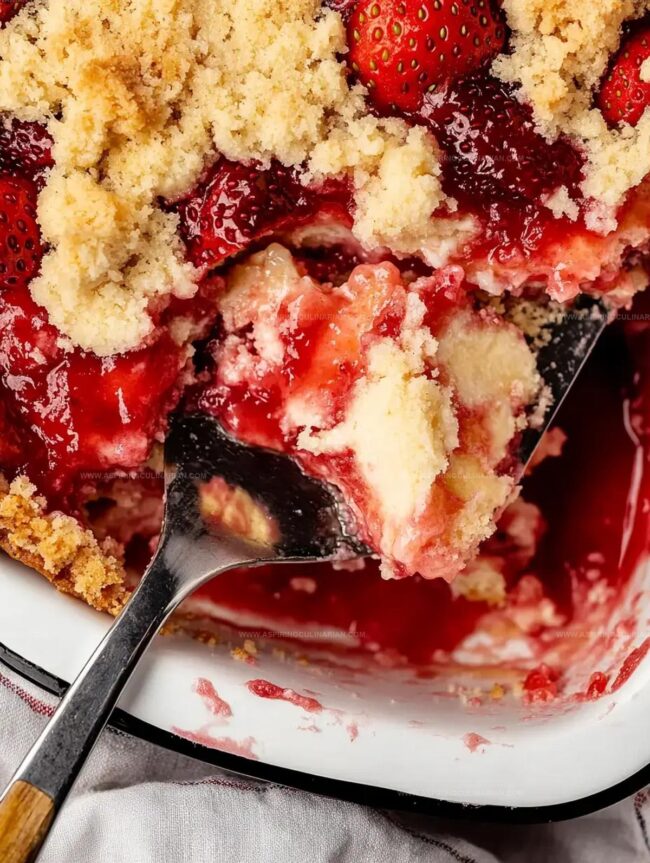
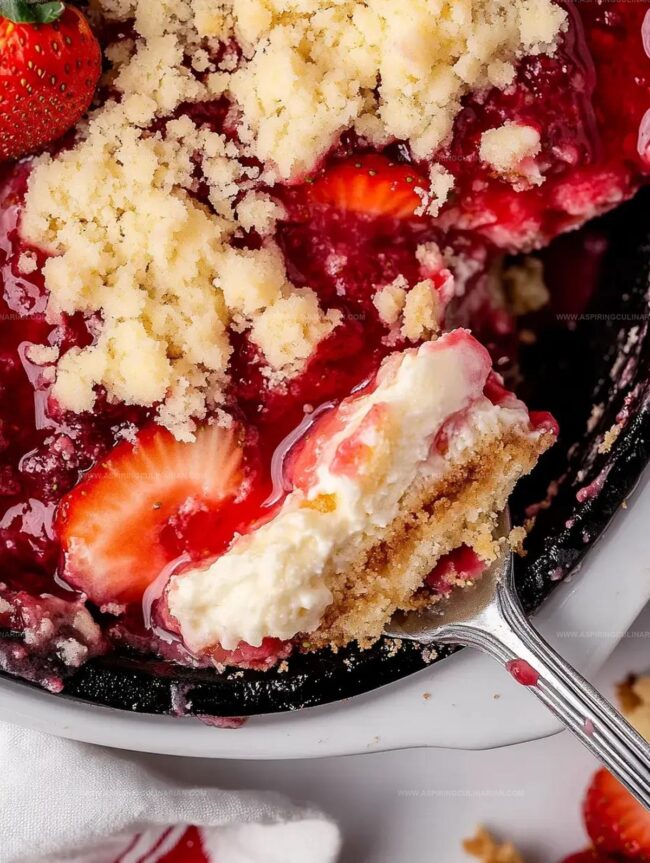
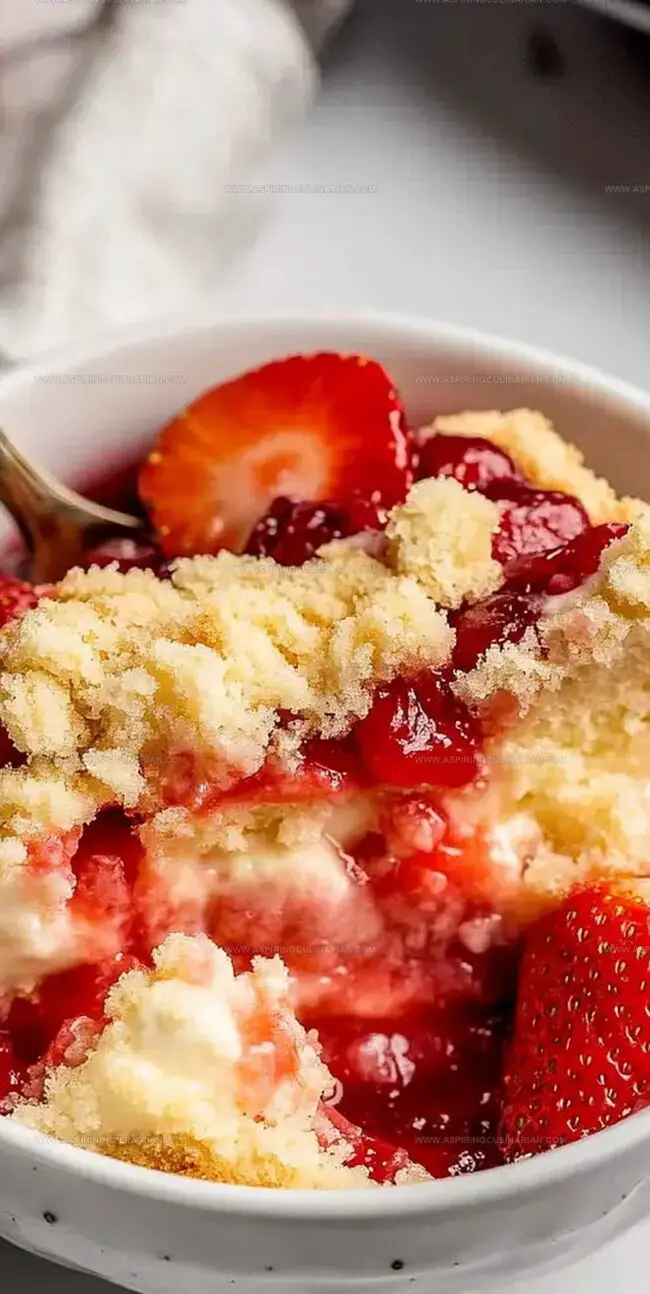
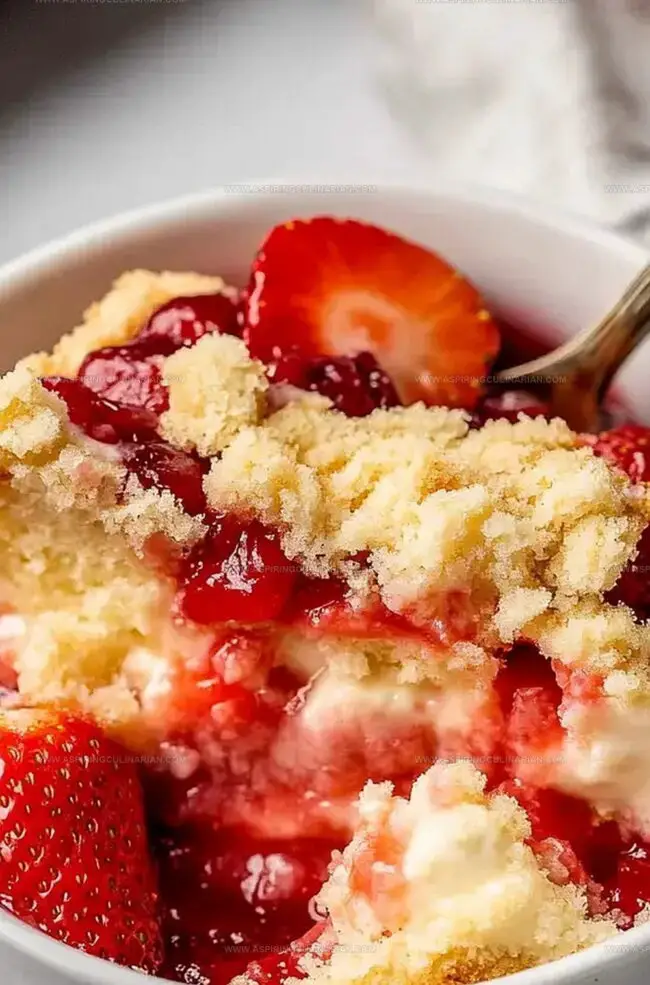
Juicy strawberries create a luscious base that melds perfectly with tender cake layers.
Crumbled ingredients cascade into the baking dish, creating a rustic and irresistible texture.
Each spoonful delivers a perfect balance of fruity sweetness and comforting cake goodness.
Warm from the oven, this dessert beckons everyone to savor its irresistible charm.
Strawberry Cheesecake Dump Cake Flavor Highlights
Ingredients for Strawberry Cheesecake Dump Cake
Fruit Layer:Cheesecake Layer:Cake and Topping Layer:Steps for Assembling Cheesecake Dump Cake
Step 1: Warm Up the Oven
Fire up your oven to a toasty 350F (175C).
Grab a 9×13-inch baking dish and give it a quick spray with cooking oil or rub it down with butter to prevent sticking.
Step 2: Create Strawberry Base
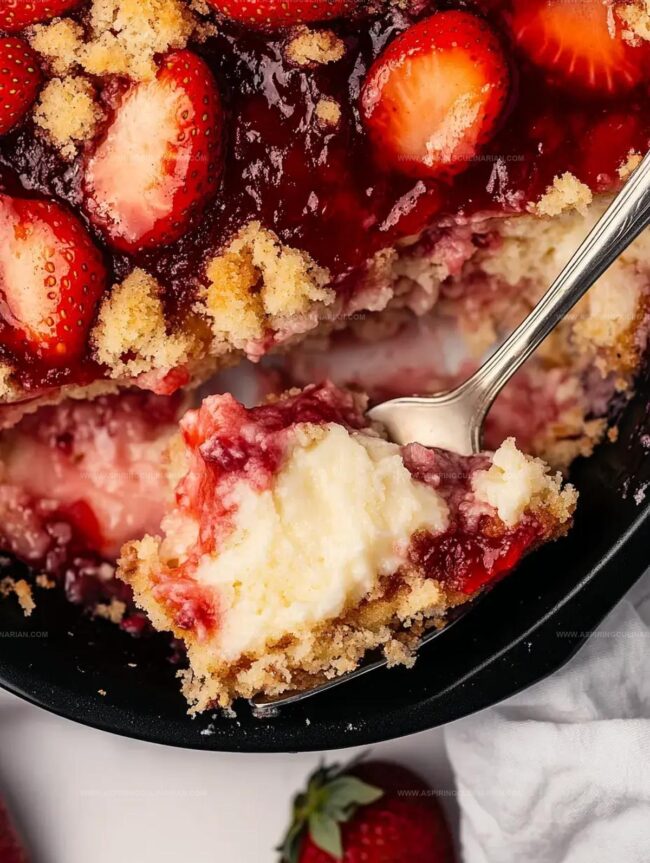
Pour the strawberry pie filling into the baking dish, spreading it out in an even, luscious layer that covers the entire bottom.
Step 3: Whip Up Cheesecake Mixture
In a mixing bowl, blend together:Whisk these ingredients until they transform into a silky-smooth mixture.
An electric mixer works magic, but a good old-fashioned hand mix can do the trick if the cream cheese is super soft.
Step 4: Dollop Cheesecake Layer
Scoop generous spoonfuls of the cream cheese mixture over the strawberry filling.
Don’t stress about making it perfect – the heat will help it spread during baking.
Step 5: Shower with Cake Mix
Sprinkle the dry cake mix across the entire surface, ensuring complete coverage of the cheesecake layer.
Step 6: Add Moisture Magic
Drizzle melted butter and milk over the cake mix.
The goal is to moisten as much of the dry mix as possible, creating a delectable texture.
Step 7: Optional Flavor Boost
If you’re feeling adventurous, dust the top with ground cinnamon and scatter chopped nuts for an extra flavor punch.
Step 8: Bake to Golden Perfection
Slide the dish into the oven and bake for 40-45 minutes.
You’re looking for a golden-brown top, bubbling edges, and a set center.
Step 9: Let It Rest
Once out of the oven, give the cake a 15-minute breather.
This helps the layers settle and makes cutting easier.
Step 10: Serve and Enjoy
Scoop into bowls while still warm.
Feeling indulgent?
Crown your creation with a dollop of whipped cream, a scoop of vanilla ice cream, or fresh strawberries.
Pro Tips for Dump Cake Baking
Strawberry Cheesecake Dump Cake Variations
Serving Suggestions for Dump Cake
Storage for Strawberry Cheesecake Dump Cake
FAQs
Yes, you can use thawed frozen strawberries, but drain excess liquid first and mix with a little sugar to create a similar consistency to pie filling.
While you can use low-fat cream cheese, full-fat cream cheese provides better texture and richer flavor for this dump cake recipe.
White or vanilla cake mix works perfectly, but yellow cake mix is also a great alternative for this strawberry cheesecake dump cake.
Yes, simply substitute the regular cake mix with a gluten-free cake mix and ensure all other ingredients are gluten-free certified.
Print
Strawberry Dump Cake Recipe
- Total Time: 45 minutes
- Yield: 12 1x
Description
Sweet magic happens when Strawberry Dump Cake arrives on your dessert table, combining effortless preparation with irresistible flavor. Home bakers can quickly craft this simple yet delightful treat that promises pure comfort in every warm, fruity bite.
Ingredients
Main Ingredients:
- 2 21-ounce (595 grams) cans strawberry pie filling
- 1 15.25-ounce (432 grams) box vanilla cake mix
- 1 8-ounce (226 grams) package cream cheese
Dairy and Butter:
- 1 stick (113 grams) butter, melted
Preparation Ingredients:
(None additional)
Instructions
- Preheat the oven to 350°F and prepare a 9×13 inch baking dish with non-stick cooking spray to ensure easy removal.
- Combine melted butter with dry cake mix, using a fork to create a coarse, crumbly texture that will form the cake’s base and topping.
- Distribute strawberry filling evenly across the bottom of the prepared baking dish, creating a vibrant fruity foundation.
- Slice cream cheese into thin, uniform pieces and carefully arrange them in a single layer over the strawberry filling, ensuring complete coverage.
- Generously scatter the prepared butter-cake mix crumbles across the top, creating a rustic, textured surface that will become golden and crisp during baking.
- Place the dish in the preheated oven and bake for approximately 30 minutes, watching for bubbling edges and a light golden-brown topping that indicates the cake is perfectly cooked.
- Remove from the oven and allow the dump cake to cool for 10-15 minutes, which helps the layers set and makes serving easier.
Notes
- Customize Texture Adjust the butter amount to control the crumble’s consistency, making it more sandy or clumpy based on personal preference.
- Enhance Flavor Sprinkle chopped fresh strawberries or a dash of vanilla extract over the cream cheese layer for added depth and brightness.
- Dietary Modifications Use gluten-free cake mix and ensure cream cheese is lactose-free to make the dessert suitable for those with dietary restrictions.
- Make-Ahead Tip Prepare the cake up to a day in advance and store covered in the refrigerator, allowing flavors to meld together before baking.
- Prep Time: 15 minutes
- Cook Time: 30 minutes
- Category: Desserts, Snacks
- Method: Baking
- Cuisine: American
Nutrition
- Serving Size: 12
- Calories: 260
- Sugar: 16 g
- Sodium: 350 mg
- Fat: 12 g
- Saturated Fat: 7 g
- Unsaturated Fat: 3 g
- Trans Fat: 0 g
- Carbohydrates: 36 g
- Fiber: 1 g
- Protein: 3 g
- Cholesterol: 30 mg
Lena Martinez
Contributing Writer & Culinary Educator
Expertise
Southwestern and Latin American cuisines, Vegetarian and plant-based recipe development, Culinary education and community outreach
Education
Santa Fe Community College, Santa Fe, NM
Certificate in Culinary Arts
Emphasized Southwestern cuisine and sustainable cooking practices
Lena grew up surrounded by the colors, spices, and traditions of the Southwest – flavors that sparked her love for bold, honest cooking. After earning her Culinary Arts certificate at Santa Fe Community College, she made it her mission to teach home cooks how to create flavorful, plant-powered meals without the fuss.
Her recipes are packed with vibrant ingredients, simple steps, and the kind of heart that turns a regular meal into something you’ll want to share. Outside the kitchen, Lena spends her time wandering farmers’ markets, trading family recipes, and helping young chefs find their voice through food.