The Sweetest Strawberry Piggy Cupcakes Recipe for Baking Fun
Sweet, adorable strawberry piggy cupcakes dance with whimsy and charm, capturing the heart of anyone who loves playful desserts.
These delightful treats blend cute piggy designs with rich strawberry flavors in an irresistible combination.
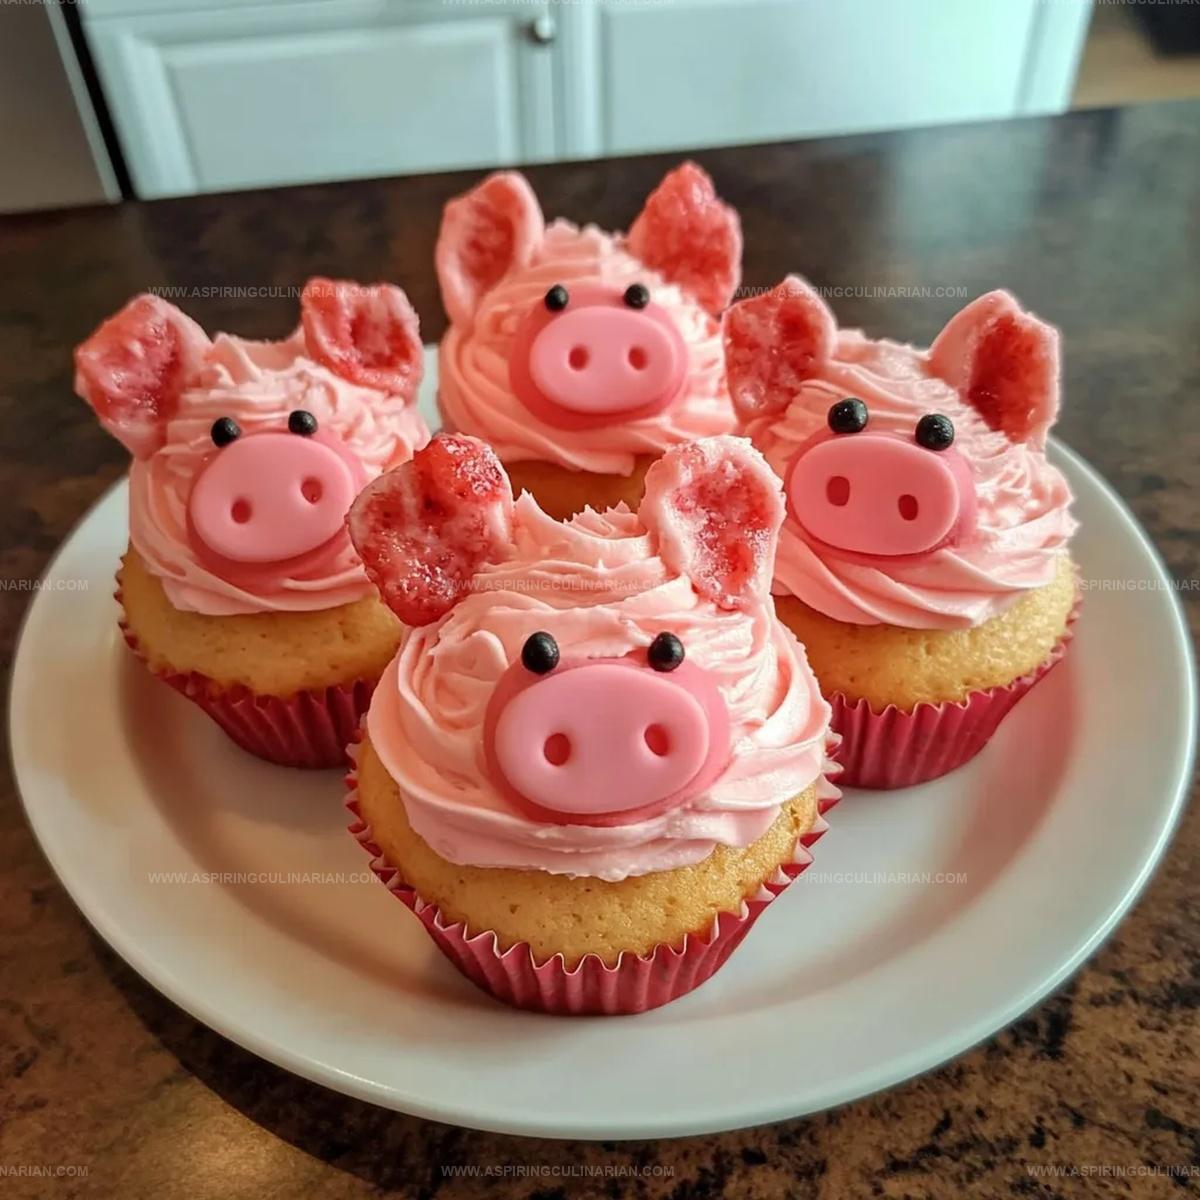
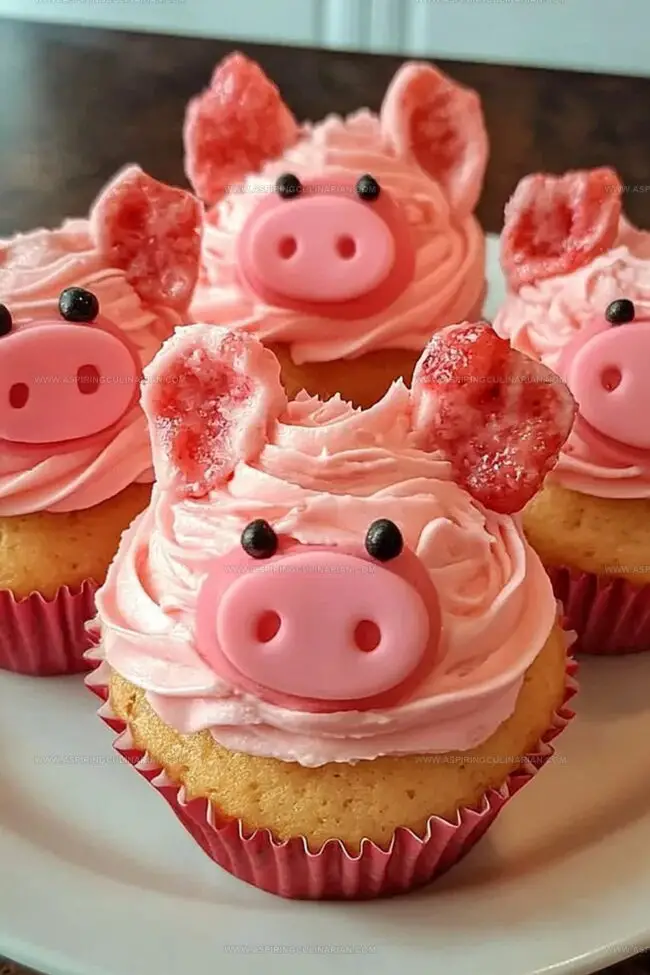
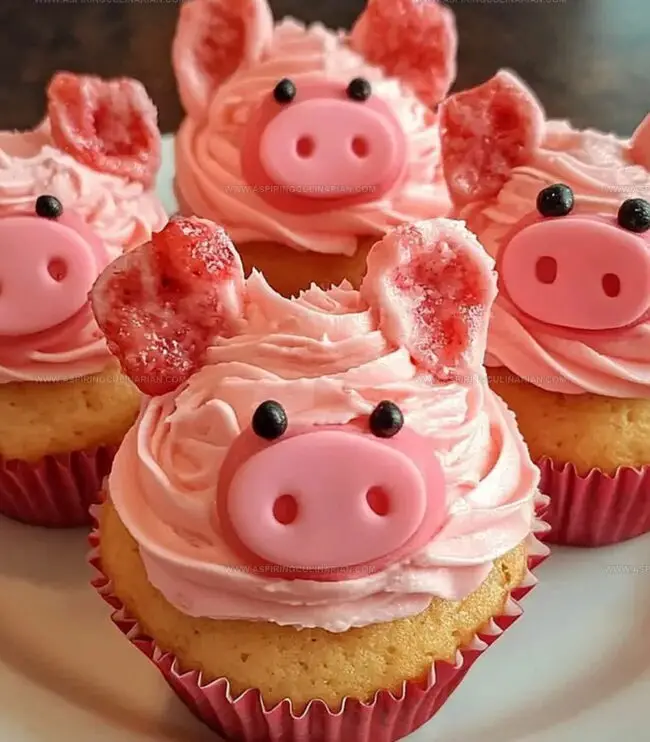
Pink frosting swirls create perfect little pig faces that bring instant smiles to children and adults alike.
Soft, moist cupcake bases provide the perfect canvas for these charming animal-themed creations.
Decorating these cupcakes becomes a fun family activity that sparks creativity and joy.
Bakers of all skill levels can craft these delectable piggy cupcakes with simple techniques and minimal professional decorating experience.
Serve these adorable desserts at birthday parties, bake sales, or just because you want to spread some sugary happiness.
Strawberry Piggy Cupcakes What Makes Them Fun

Gather These Ingredients for Strawberry Piggy Cupcakes
Dry Ingredients:Wet Ingredients:Frosting and Decoration:Stepwise Process for Strawberry Piggy Cupcakes
Step 1: Prep Baking Station
Warm up the oven to 350F.
Slide cupcake liners into a standard muffin pan, creating cozy homes for your adorable piggy treats.
Step 2: Blend Dry Ingredients
Grab a mixing bowl and whisk flour, baking powder, and salt until they dance together smoothly.
Step 3: Whip Butter and Sugar
Grab an electric mixer and transform butter and sugar into a fluffy cloud-like mixture that’s light as air.
Step 4: Incorporate Eggs
Drop eggs into the buttery mixture one at a time, giving each a thorough beating.
Splash in vanilla for extra flavor magic.
Step 5: Merge Batter Components
Slowly introduce dry ingredients to wet ingredients, alternating with milk.
Stir gently to keep the batter tender and soft.
Step 6: Fold Fruity Chunks
Tenderly mix fresh strawberry pieces into the batter, creating delightful fruity surprises.
Step 7: Bake Cupcake Bases
Fill cupcake liners about 3/4 full with batter.
Slide into the oven and bake until a toothpick comes out clean, around 18-20 minutes.
Step 8: Cool Down
Let cupcakes rest in the pan for 5 minutes, then transfer to a cooling rack to chill completely.
Step 9: Whisk Creamy Frosting
Beat butter until smooth.
Gradually add powdered sugar, vanilla, and cream.
Whip until fluffy and light.
Tint with pink food coloring for a soft rosy hue.
Step 10: Frost with Flair
Cover each cupcake with a generous swirl of pink frosting, creating a smooth dome.
Step 11: Design Piggy Faces
Step 12: Serve and Delight
Present your adorable piggy cupcakes immediately or refrigerate until ready to enjoy.
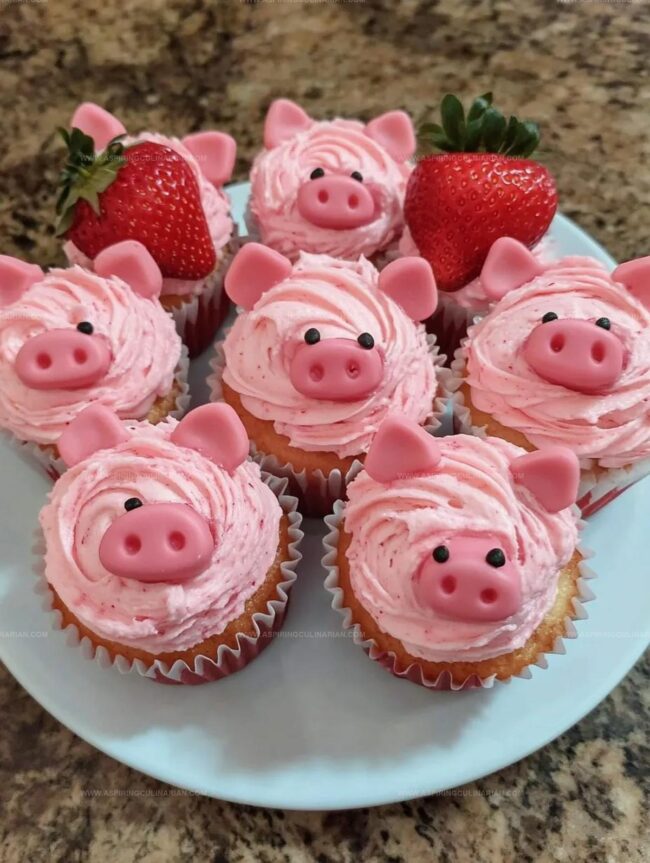
For maximum cuteness, add strawberry decorations just before serving.
Strawberry Piggy Cupcakes Helpful Tricks for Perfect Results
Ways to Change Up Strawberry Piggy Cupcakes
Presenting Strawberry Piggy Cupcakes for Smiles All Around
Smart Storage for Strawberry Piggy Cupcakes
FAQs
Yes, you can use frozen strawberries, but make sure to thaw and drain them completely before adding to the batter to prevent excess moisture.
Toss the diced strawberries in a little flour before folding them into the batter. This helps prevent them from sinking during baking.
Mini chocolate chips are ideal for creating small, precise nostrils on the strawberry piggy faces. Regular-sized chocolate chips might be too large.
Print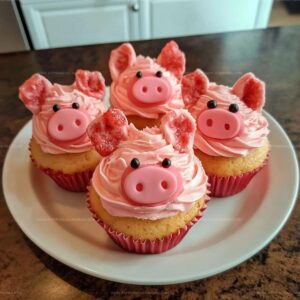
Strawberry Piggy Cupcakes Recipe
- Total Time: 45 minutes
- Yield: 24 1x
Description
Sweet strawberry piggy cupcakes dance with whimsical charm, bringing playful farm-inspired dessert magic to kitchen counters. Pink frosted piggies peek out with adorable character, inviting bakers to create delightful treats that spark joy and delight.
Ingredients
Cupcake Batter:
- 1.5 cups (354 ml) all-purpose flour
- 1.5 teaspoons baking powder
- 0.25 teaspoon salt
- 0.5 cup (113 grams) unsalted butter, softened
- 0.75 cup (150 grams) granulated sugar
- 2 large eggs
- 1 teaspoon vanilla extract
- 0.5 cup (120 ml) milk
- 0.5 cup fresh strawberries, diced
Pink Buttercream Frosting:
- 1 cup (227 grams) unsalted butter, softened
- 2 cups (240 grams) powdered sugar
- 2 tablespoons heavy cream or milk
- 1 teaspoon vanilla extract
- Pink food coloring (preferably gel)
Decorations:
- Fresh strawberries (sliced into rounds for snouts)
- Fresh strawberries (small pieces for ears)
- Chocolate sprinkles (for eyes and eyebrows)
- Mini chocolate chips (for nostrils)
Instructions
- Prepare an oven-safe muffin tin by lining with cupcake liners and heating to 350F (175C).
- Combine flour, baking powder, and salt in a medium mixing bowl, thoroughly whisking the dry ingredients.
- Using an electric mixer, cream butter and sugar until the mixture becomes light and airy, approximately 2-3 minutes.
- Incorporate eggs individually into the butter mixture, ensuring complete blending after each addition. Mix in vanilla extract.
- Gradually integrate dry ingredients with wet ingredients, alternating with milk. Mix on low speed, being cautious not to overmix the batter.
- Delicately fold diced strawberries into the prepared batter using a spatula.
- Distribute batter evenly into cupcake liners, filling approximately 3/4 full. Bake for 18-20 minutes until a toothpick emerges clean.
- Allow cupcakes to rest in the pan for 5 minutes, then transfer to a wire rack for complete cooling.
- Prepare buttercream by whipping softened butter until creamy. Gradually add powdered sugar, vanilla, and heavy cream. Beat on medium-high speed until fluffy, incorporating pink food coloring to achieve desired shade.
- Apply a generous layer of pink frosting atop each cooled cupcake, creating a smooth, rounded surface.
- Design piggy faces by positioning a strawberry slice as the snout, adding chocolate chip nostrils, strawberry piece ears, and chocolate sprinkle eyes and eyebrows.
- Serve immediately or refrigerate, recommending decoration just before presentation for optimal freshness.
Notes
- Prevent Strawberry Sinking Toss diced strawberries in a light dusting of flour before folding into the batter to prevent them from sinking during baking.
- Create Moist Texture Use room temperature ingredients like eggs and milk to ensure even mixing and a tender, moist cupcake crumb.
- Dairy-Free Alternative Swap whole milk with almond or oat milk, and use dairy-free butter for a lactose-free version of these adorable piggy cupcakes.
- Decoration Prep Chill strawberry pieces briefly before decorating to maintain their crisp shape and prevent bleeding of color onto the frosting.
- Prep Time: 25 minutes
- Cook Time: 20 minutes
- Category: Desserts, Snacks
- Method: Baking
- Cuisine: American
Nutrition
- Serving Size: 24
- Calories: 220
- Sugar: 14 g
- Sodium: 150 mg
- Fat: 10 g
- Saturated Fat: 6 g
- Unsaturated Fat: 4 g
- Trans Fat: 0 g
- Carbohydrates: 30 g
- Fiber: 1 g
- Protein: 2 g
- Cholesterol: 40 mg
Lena Martinez
Contributing Writer & Culinary Educator
Expertise
Southwestern and Latin American cuisines, Vegetarian and plant-based recipe development, Culinary education and community outreach
Education
Santa Fe Community College, Santa Fe, NM
Certificate in Culinary Arts
Emphasized Southwestern cuisine and sustainable cooking practices
Lena grew up surrounded by the colors, spices, and traditions of the Southwest – flavors that sparked her love for bold, honest cooking. After earning her Culinary Arts certificate at Santa Fe Community College, she made it her mission to teach home cooks how to create flavorful, plant-powered meals without the fuss.
Her recipes are packed with vibrant ingredients, simple steps, and the kind of heart that turns a regular meal into something you’ll want to share. Outside the kitchen, Lena spends her time wandering farmers’ markets, trading family recipes, and helping young chefs find their voice through food.