
The Perfect Tuna Melt Wrap Recipe: Cheesy Comfort On-The-Go
When hunger strikes, a delectable tuna melt wrap recipe emerges as the perfect solution for a quick and satisfying meal.
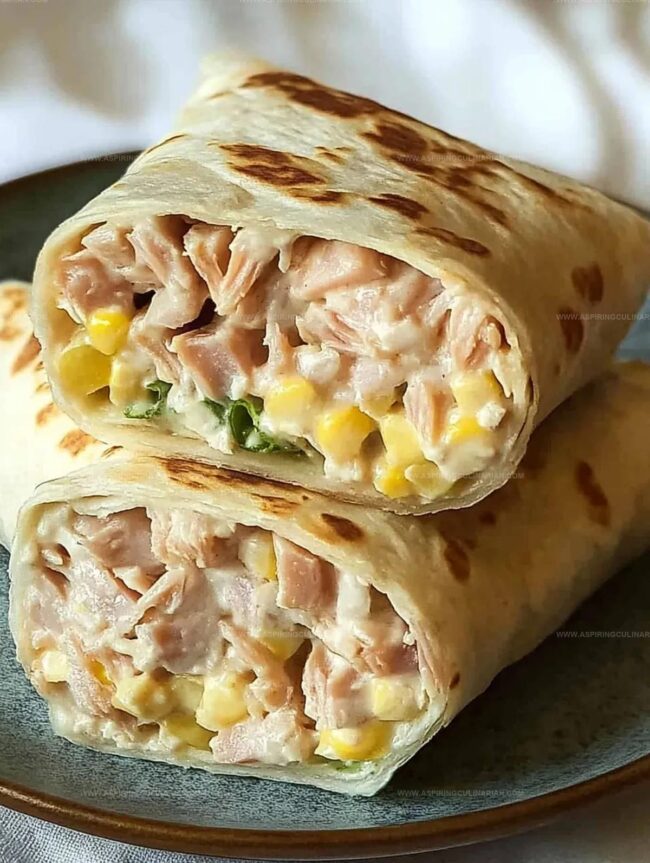
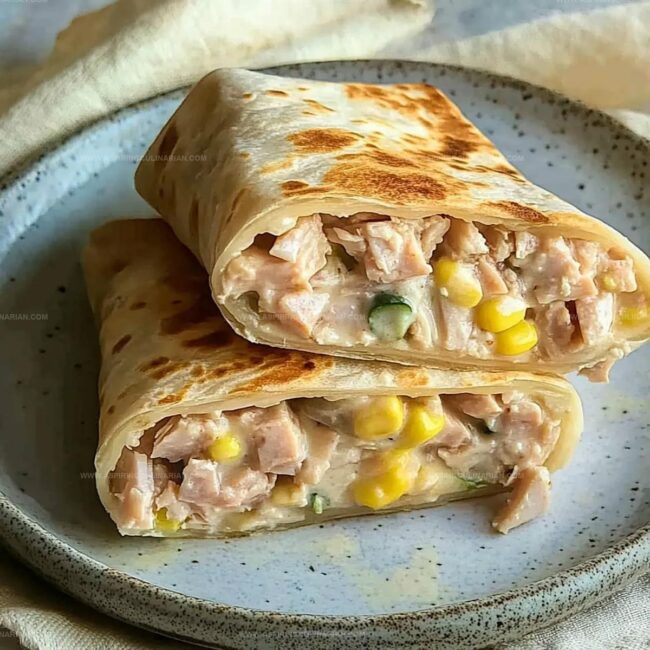
Packed with creamy tuna, melted cheese, and fresh ingredients, this wrap delivers incredible flavor in every bite.
The combination of soft tortilla and warm, gooey filling creates a comforting lunch or dinner option.
Crisp vegetables add a delightful crunch that complements the rich tuna mixture.
Simple to assemble and even easier to devour, this wrap transforms basic ingredients into a mouthwatering masterpiece.
Elevate your lunch routine with this effortless and delicious tuna melt wrap that promises to tantalize your taste buds and leave you completely satisfied.
What Makes Tuna Melt Wraps Special
Tuna Melt Wrap Must-Haves
Protein Base:Cheese and Dairy:Vegetables and Flavor Enhancers:Seasonings:Wrap Base:Cooking Ingredient:Easy Tuna Melt Wrap Assembly
Step 1: Craft Tuna Mixture
Grab a mixing bowl and blend your tuna with tangy yogurt, zesty mustard, bright lemon juice, sweet corn kernels, diced onion, pickle relish, garlic powder, and a sprinkle of pepper.
Stir everything together until the ingredients are evenly distributed, creating a mouthwatering filling that’s packed with flavor.
Step 2: Warm Tortilla Foundation
Quickly heat your tortilla on a skillet or in the microwave to make it soft and pliable.
This helps prevent cracking when you roll your wrap and makes the tortilla more flexible.
Step 3: Layer Delicious Components
Spread a generous layer of cheese across the center of the warm tortilla.
Carefully spoon your prepared tuna mixture on top of the cheese, leaving a small border around the edges to prevent spillage during rolling.
Step 4: Master The Wrap Technique
Fold the side edges of the tortilla inward, then lift the bottom edge and tuck it under the filling.
Roll the wrap away from you, applying gentle pressure to keep the filling compact and secure.
Step 5: Create Golden Crispy Exterior
Heat a skillet with a touch of oil over medium heat.
Place your wrap seam-side down and cook for 3-4 minutes until the bottom turns a beautiful golden brown.
Flip carefully and cook the other side until the cheese melts and the wrap is crispy and heated through.
Step 6: Serve And Enjoy
Transfer your tuna melt wrap to a plate, slice diagonally if desired, and serve immediately while hot and crispy.
Perfect for a quick lunch or satisfying snack!
Tips for Perfect Tuna Melt Wraps
Fresh Wrap Variations with Tuna Melt
Serving Up Tuna Melt Wraps
Tuna Melt Wrap Storage Instructions
FAQs
Yes, you can easily substitute canned salmon for tuna in this wrap recipe. The flavor will be slightly different but still delicious.
Greek yogurt works great because it’s thick and creamy, providing a tangy flavor. However, regular plain yogurt can also work well if that’s what you have on hand.
A medium-sized flour tortilla works best for this recipe. Whole wheat tortillas are also a good option for added nutrition and a slightly nuttier flavor.
While it’s best served fresh and hot, you can prepare the tuna mixture in advance and store it in the refrigerator for up to two days before assembling and grilling the wrap.
Print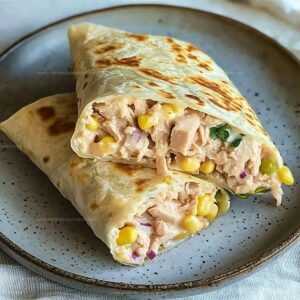
Tuna Melt Wrap Recipe
- Total Time: 18 minutes
- Yield: 1 1x
Description
Comforting Tuna Melt Wrap brings classic deli flavors together with melted cheese and zesty tuna salad, perfectly rolled in a warm tortilla. Crispy edges and gooey center promise you’ll savor each delicious bite of this quick, satisfying meal.
Ingredients
Protein:
- 1 can (5 ounces/142 grams) skipjack or yellowfin tuna
Vegetables and Aromatics:
- 1/4 cup corn
- 1/4 cup diced red onion
- 1/2 teaspoon garlic powder
- 1/4 teaspoon black pepper
Binding and Flavor Ingredients:
- 2 tablespoons Greek yogurt
- 1/2 tablespoon Dijon mustard
- 1 tablespoon lemon juice (1/2 lemon)
- 1 tablespoon dill relish or capers
Wrap and Cheese:
- 1 burrito-sized wrap (at least 10 inches)
- 1/4 cup shredded mozzarella cheese
Cooking Ingredient:
- Olive oil for grilling
Instructions
- In a mixing bowl, blend drained tuna with tangy yogurt, zesty mustard, bright lemon juice, sweet corn kernels, finely chopped onion, pickle relish, aromatic garlic powder, and cracked black pepper until thoroughly combined.
- Gently warm the tortilla for enhanced pliability, ensuring it remains soft and flexible.
- Strategically place shredded cheese as the initial layer across the tortilla’s surface, followed by an even distribution of the prepared tuna mixture, maintaining a small border around the edges to prevent spillage during rolling.
- Carefully fold the tortilla’s side edges inward, then lift the bottom section and tightly roll the wrap away from yourself, creating a compact and secure package.
- Heat a skillet with a light coating of oil over medium temperature, positioning the wrap seam-side down.
- Grill the wrap for 3-4 minutes on each side, rotating carefully to achieve a golden-brown exterior and ensure the cheese melts completely into the filling.
- Remove from heat, let rest briefly, then slice diagonally and serve immediately while warm and crispy.
Notes
- Choose low-fat Greek yogurt for a healthier twist that keeps the filling creamy and protein-packed.
- Drain tuna thoroughly to prevent soggy wrap and ensure a crisp, golden exterior when grilling.
- Swap regular tortillas with gluten-free or whole wheat options to accommodate different dietary needs and boost nutritional value.
- Add fresh herbs like dill or chives for an extra layer of flavor that brightens the entire wrap.
- Prep Time: 10 minutes
- Cook Time: 8 minutes
- Category: Lunch, Snacks
- Method: Grilling
- Cuisine: American
Nutrition
- Serving Size: 1
- Calories: 400
- Sugar: 2 g
- Sodium: 600 mg
- Fat: 18 g
- Saturated Fat: 5 g
- Unsaturated Fat: 10 g
- Trans Fat: 0 g
- Carbohydrates: 40 g
- Fiber: 4 g
- Protein: 30 g
- Cholesterol: 50 mg
Lena Martinez
Contributing Writer & Culinary Educator
Expertise
Southwestern and Latin American cuisines, Vegetarian and plant-based recipe development, Culinary education and community outreach
Education
Santa Fe Community College, Santa Fe, NM
Certificate in Culinary Arts
Emphasized Southwestern cuisine and sustainable cooking practices
Lena grew up surrounded by the colors, spices, and traditions of the Southwest – flavors that sparked her love for bold, honest cooking. After earning her Culinary Arts certificate at Santa Fe Community College, she made it her mission to teach home cooks how to create flavorful, plant-powered meals without the fuss.
Her recipes are packed with vibrant ingredients, simple steps, and the kind of heart that turns a regular meal into something you’ll want to share. Outside the kitchen, Lena spends her time wandering farmers’ markets, trading family recipes, and helping young chefs find their voice through food.